全步骤:
 <代码类=" language-bash "> [root@localhost ~] # yum安装yum-utils device-mapper-persistent-data lvm2 - y
  root@localhost ~ # yum-config-manager——add-repo https://mirrors.aliyun.com/docker-ce/linux/centos/docker-ce.repo
  (root@localhost ~) # yum安装- y docker-ce
  (root@localhost ~) # systemctl firewalld.service停止
  (root@localhost ~) # setenforce 0
  (root@localhost ~) # systemctl docker.service开始
  (root@localhost ~) # systemctl启用docker.service
  #三通/etc/docker/daemon. root@localhost ~json & lt; & lt;——“EOF”
  {
  “registry-mirrors”(“https://w1ogxqvl.mirror.aliyuncs.com”):
  }
  EOF
  (root@localhost ~) # systemctl daemon-reload
  (root@localhost ~) # systemctl重启码头工人
  (root@localhost ~) #码头工人拉centos: 7
  root@localhost ~ #码头工人的照片
  标签影像ID创建存储库的大小
  centos 7 5 e35e350aded 6周前203 mb

  root@localhost ~ # cd/opt/root@localhost选择# mkdir nginx
  root@localhost选择# cd nginx/# vim Dockerfile root@localhost nginx
  #基于基础镜像
  从5 e35e350aded
  #用户信息
  维护者的nginx & lt; zjx>
  #添加环境包
  运行yum安装- y proc-devel gcc gcc-c + + zlib zlib-devel openssl-devel wget
  #下载nginx软件包
  wget运行http://nginx.org/download/nginx-1.9.7.tar.gz
  运行tar zxvf nginx-1.9.7.tar.gz
  #指定工作目录
  WORKDIR nginx-1.9.7/运行./configure——prefix=/usr/地方/nginx,,使,,制作安装
  #指定http和https端口
  80年公开
  443年公开
  #关闭守护进程
  运行回声“守护进程;”在在/usr/地方/nginx/conf/nginx.conf
  WORKDIR/root/nginx
  #添加宿主机中run.sh到容器中
  添加运行。sh/run.sh
  运行chmod 755/run.sh
  CMD (“/run.sh”)

  # vim run.sh root@localhost nginx
  # !/bin/bash/usr/local/nginx/sbin/nginx

  #创建新镜像
  [root@localhost nginx] #码头工人建造- t nginx:新的。

  #启动容器进行测试
  [root@localhost nginx] #码头工人运行- d - p nginx:新的
  1 e42f3a46caf349a964c4304b900ecb406102e3dc7e5beae16293f071470e54b
  [root@localhost nginx] #码头工人ps -
  容器标识图像命令创建状态端口名称
  1 e42f3a46caf nginx:新的“/运行。上海“8秒前7秒0.0.0.0:32769→80/tcp 0.0.0.0:32768→443/tcp hardcore_cerf
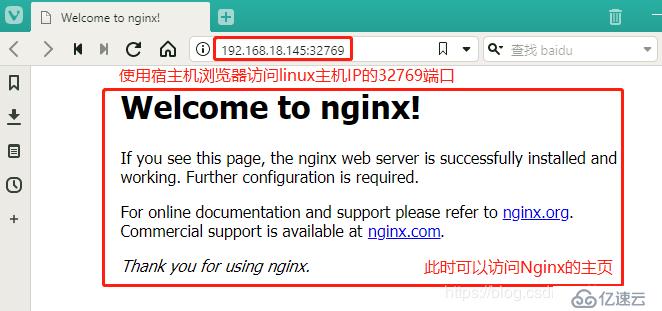
验证:回到宿主机在浏览器中访问CentOS的IP地址的32769端口,看是否可以访问Nginx主页