介绍 & lt; dependency>
& lt; groupId> org.springframework.boot
& lt; artifactId> spring-boot-starter-actuator
& lt;/dependency> & lt; plugin>
& lt; groupId> pl.project13.maven
& lt; artifactId> git-commit-id-plugin
& lt; version> 2.1.15
& lt; executions>
& lt; execution>
& lt; goals>
& lt; goal> revision
& lt;/goals>
& lt;/execution>
& lt;/executions>
& lt; configuration>
& lt; dotGitDirectory> $ {project.basedir}/.git
& lt;/configuration>
& lt;/plugin>
今天就跟大家聊聊有关在春天引导中使用/信息端点怎么实现输出Git的版本信息,可能很多人都不太了解,为了让大家更加了解,小编给大家总结了以下内容,希望大家根据这篇文章可以有所收获。
<强> POM配置
首先,我们可以挑选任意一个弹簧启动项目,修改它的<代码>砰的一声。xml :
- <李>引入spring-boot-starter-actuator,提供/信息端点
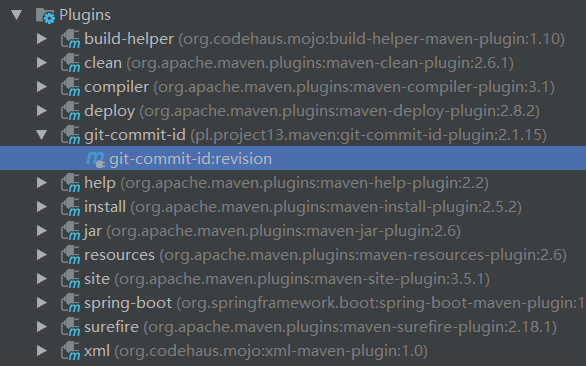
- <李>添加git-commit-id-plugin插件,该插件用来产生git的版本信息李
- <李>在完成了上面的配置之后,执行git-commit-id-plugin插件
运行完成后,我们可以在控台中看到类似下面的信息:
[信息]pl.project13.maven.git.log。MavenLoggerBridge - dotGitDirectory E: \ git_project \ oschina \ SpringBoot-Learning \ .
  [信息]pl.project13.maven.git.log。MavenLoggerBridge——git.build.user.name迪迪
  [信息]pl.project13.maven.git.log。MavenLoggerBridge——git.build.user。电子邮件dyc87112@qq.com
  [信息]pl.project13.maven.git.log。MavenLoggerBridge - git。部门主
  [信息]pl.project13.maven.git.log。MavenLoggerBridge————总是=true
  [信息]pl.project13.maven.git.log。MavenLoggerBridge————脏脏
  [信息]pl.project13.maven.git.log。MavenLoggerBridge - - abbrev=7
  [信息]pl.project13.maven.git.log。参MavenLoggerBridge——标签[[Ref [refs/标签/chapter1=ec8713f61cd49569886708a08adea02c8ef0a112]]]
  [信息]pl.project13.maven.git.log。MavenLoggerBridge——创建地图({}):
  [信息]pl.project13.maven.git.log。MavenLoggerBridge——头[e0540b3524378de9b5d938668a0f75ec016fa5e5]
  [信息]pl.project13.maven.git.log。MavenLoggerBridge——回购在肮脏的国家(真正的)
  [信息]pl.project13.maven.git.log。MavenLoggerBridge——git.commit.id.describe e0540b3-dirty
  [信息]pl.project13.maven.git.log。MavenLoggerBridge——git.commit.id e0540b3524378de9b5d938668a0f75ec016fa5e5
  [信息]pl.project13.maven.git.log。MavenLoggerBridge——git.commit.id.abbrev e0540b3
  [信息]pl.project13.maven.git.log。MavenLoggerBridge - git。肮脏的真实
  …
同时,在 <代码>目标/类目录下,我们可以发现产生了一个<代码> git。属性>
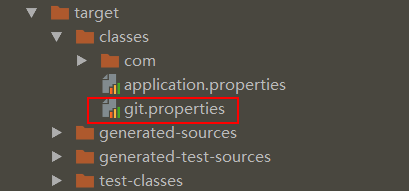
这个文件就是当前项目的Git信息,它的内容如下:
 # Git-Commit-Id-Plugin生成的
  # 2017年6月01 17:57:53 CST星期四
  git.build.user.email=dyc87112@qq.com
  git.build.host=Lenovo-zhaiyc
  git.dirty=true
  git.remote.origin.url=https \://git.oschina.net/didispace/SpringBoot-Learning.git
  git.closest.tag.name=chapter1
  git.commit.id.describe-short=e0540b3-dirty
  git.commit.user.email=dyc87112@qq.com
  git.commit.time=2017 - 06 - 01 - t17 \: 57 \: 10 + 0800
  git.commit.message.full=更新
  git.build.version=1.0.0
  git.commit.message.short=更新
  git.commit.id.abbrev=e0540b3
  git.branch=主
  git.build.user.name=迪迪
  git.closest.tag.commit.count=240
  git.commit.id.describe=e0540b3-dirty
  git.commit.id=e0540b3524378de9b5d938668a0f75ec016fa5e5
  git.tags=git.build.time=2017 - 06 - 01 - t17 \: 57 \: 53 + 0800
  git.commit.user.name=迪迪
完成了上述配置之后,启动应用并访问端点,比如:<代码>旋度localhost: 8080/信息> 其中包含了关于分支和提交的基础信息。而这个信息格式是最简模式,我们也可以通过配置下面的参数来获取更全面的git信息:在春天引导中使用/信息端点怎么实现输出Git的版本信息