
这期内容当中小编将会给大家带来有关PhpStorm2020 + phpstudyV8 +XDebug的使用教程,文章内容丰富且以专业的角度为大家分析和叙述,阅读完这篇文章希望大家可以有所收获。
1.1、下载phpStudy
解压后运行exe进行安装,我的安装目录是:D:\phpstudy_pro
1.2、配置环境:
在桌面启动小皮进行配置,我的配置如下:
首页面板:启动"WNMP"
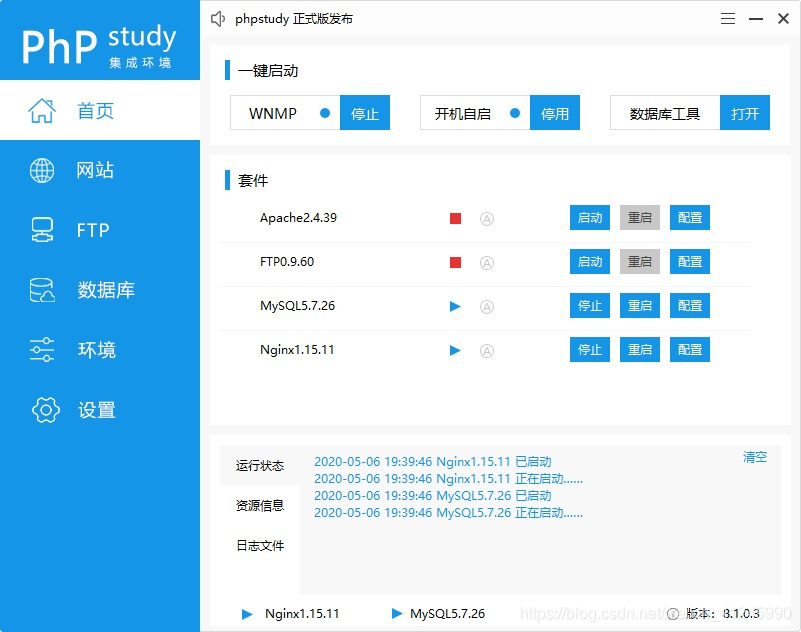
网站面板:PHP版本

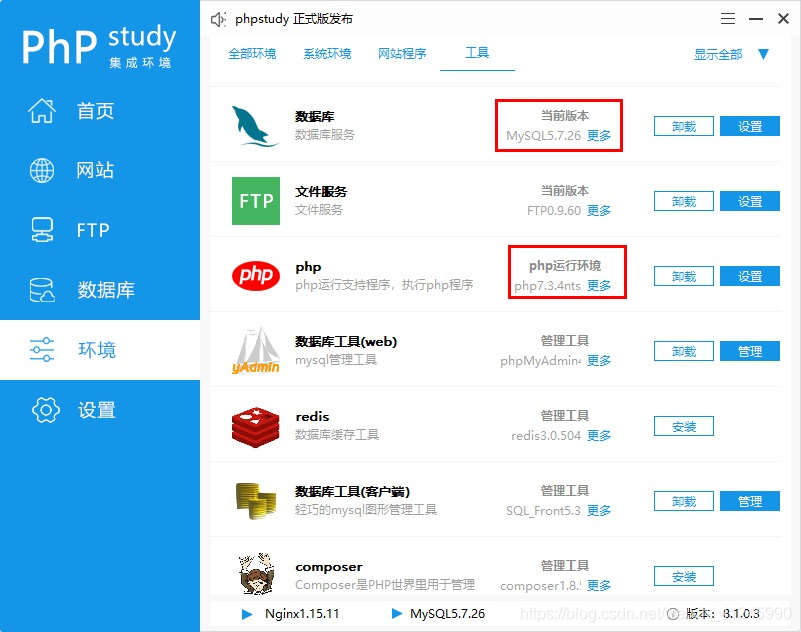
环境面板:数据库、PHP运行环境
2.1、下载phpStudy
下载地址:https://blog.jetbrains.com/phpstorm/2020/03/phpstorm-2020-1-beta/
我使用的是缺省目录进行安装,如何激活在这就不详细说了。
2.1、配置PHP版本信息
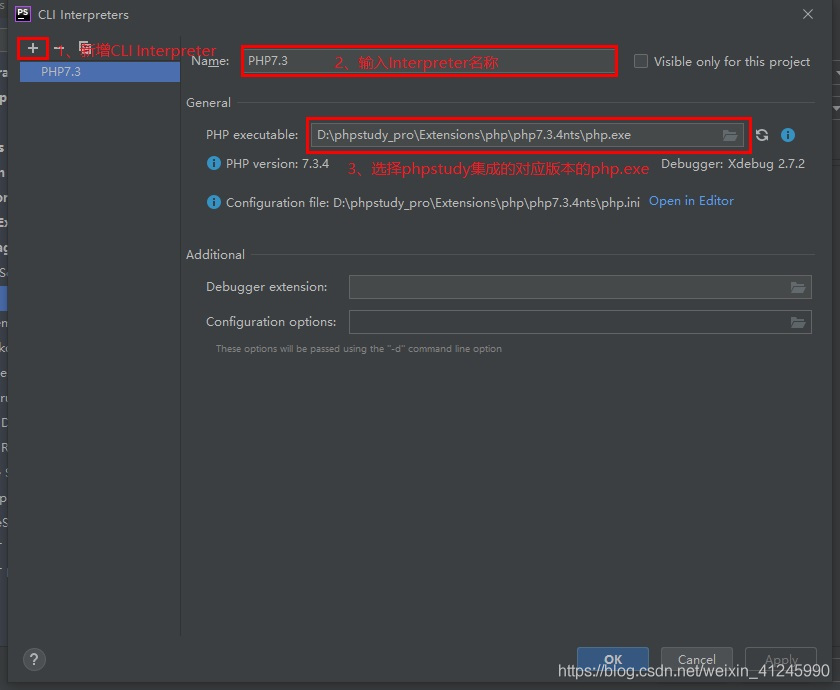
我们点击“File->Settings”菜单进行PHP版本配置,使用和phpstudy对应的版本PHP7.3.4。
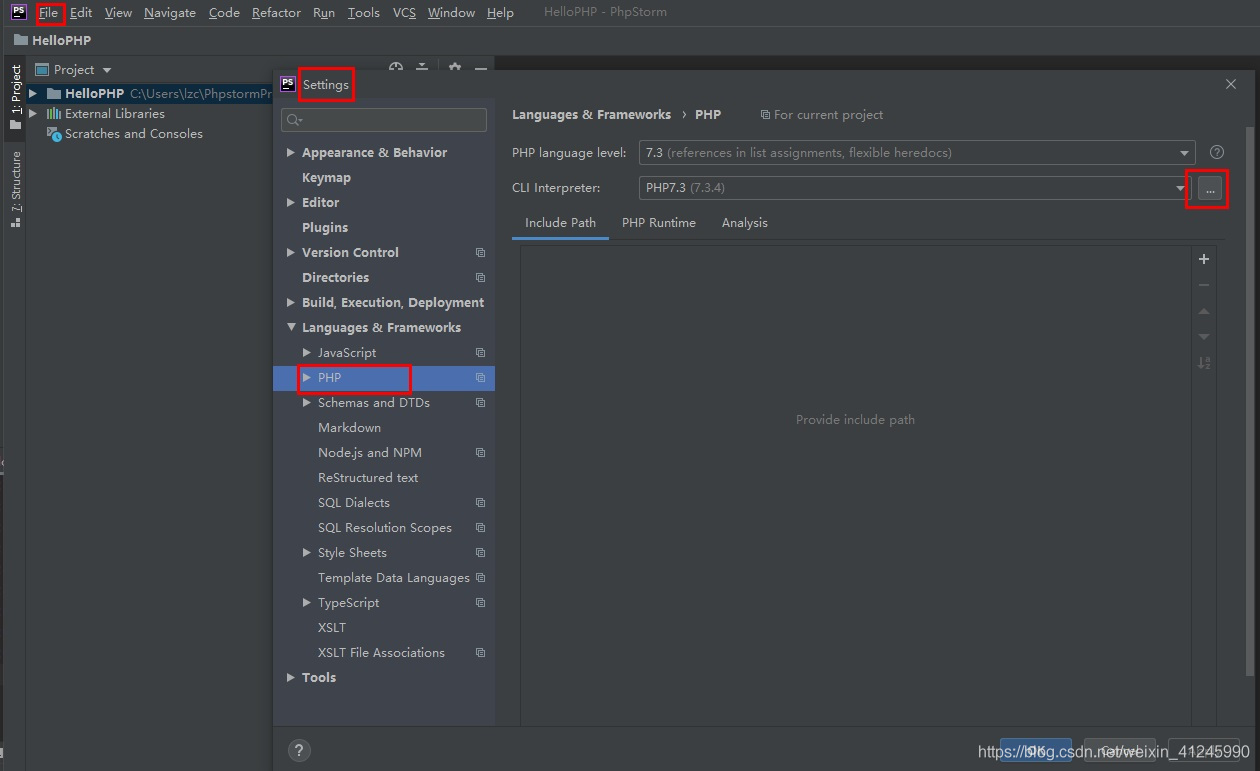
注意:Interpreter默认是没有的,我们需要点击右边的按钮进行配置。
3、新建测试工程
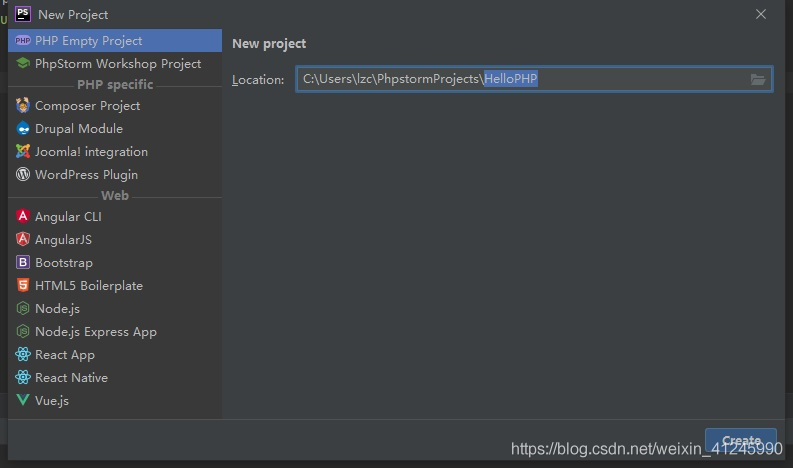
3.1、使用PhpStorm新建工程"HelloPHP"
第一步:打开PhpStorm软件,点击创建新项目,在输入框填写带项目存放地址的项目名称,完成后点击创建。
3.2、配置工程的本地服务
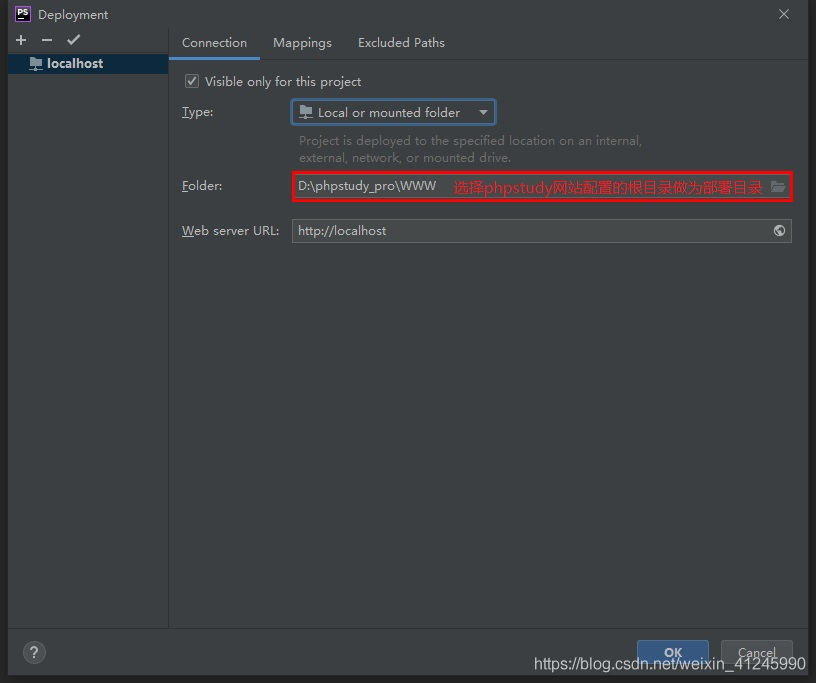
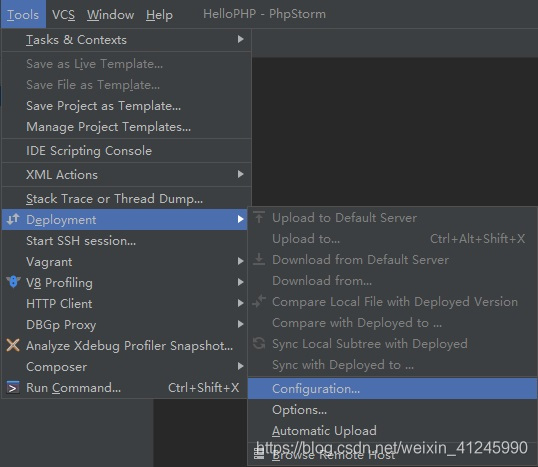
我们点击“工具/部署/配置”菜单进行本地服务配置
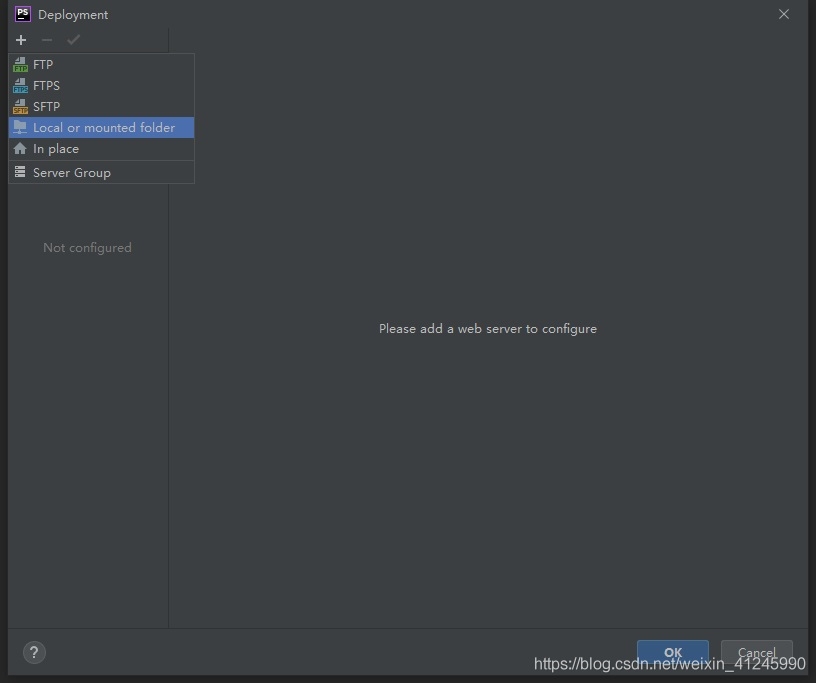
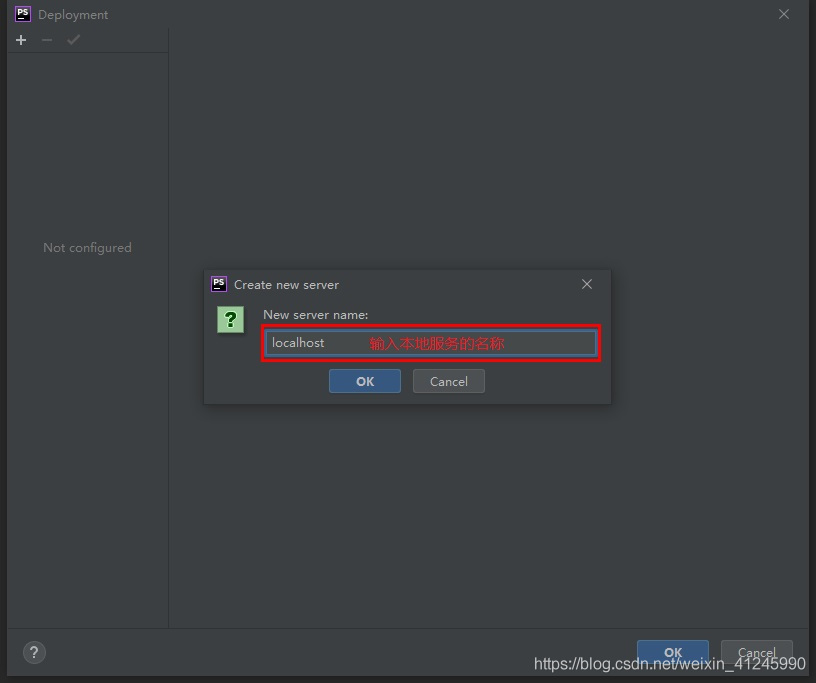
点击确定后进行具体配置:
Connection面板:配置部署目录

Mappings面板:配置相对目录和访问地址
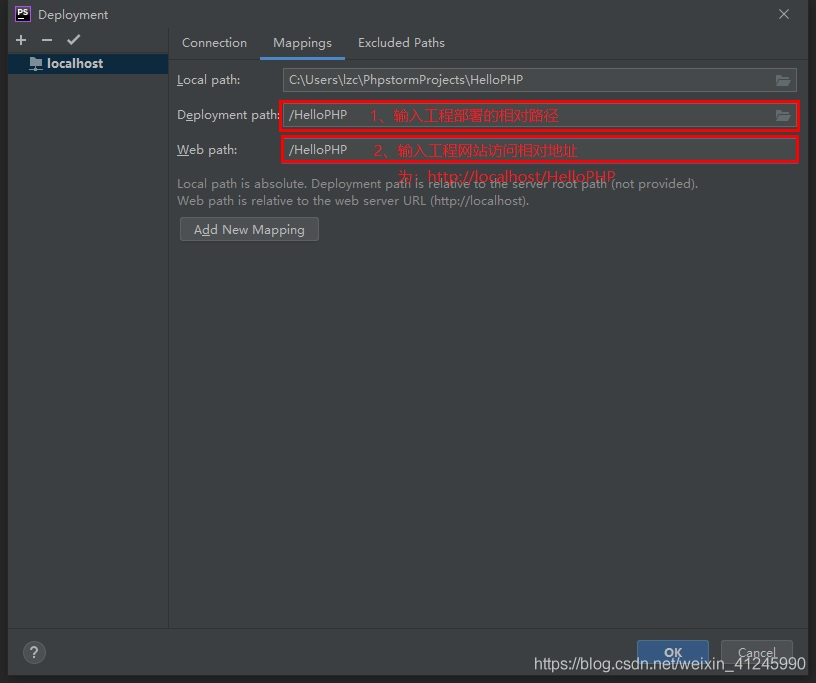
配置完之后点击“确定”。
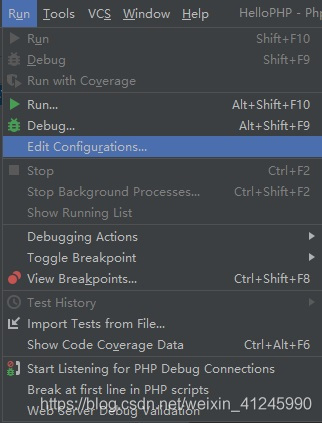
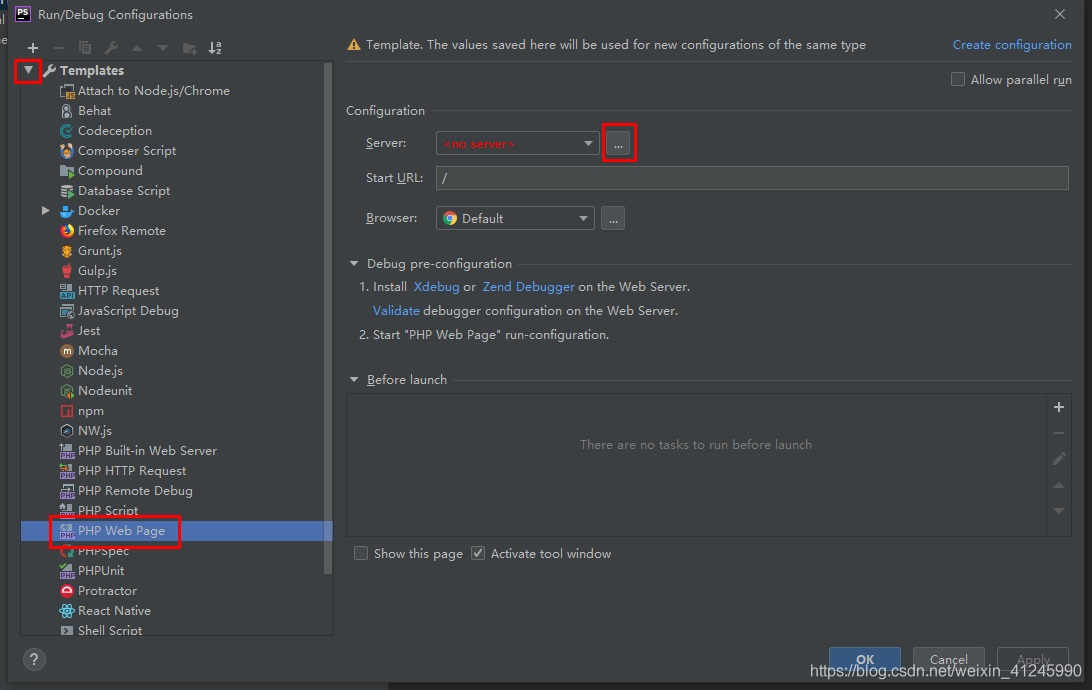
3.3、配置运行环境
我们点击“运行/编辑配置”菜单进行运行环境配置

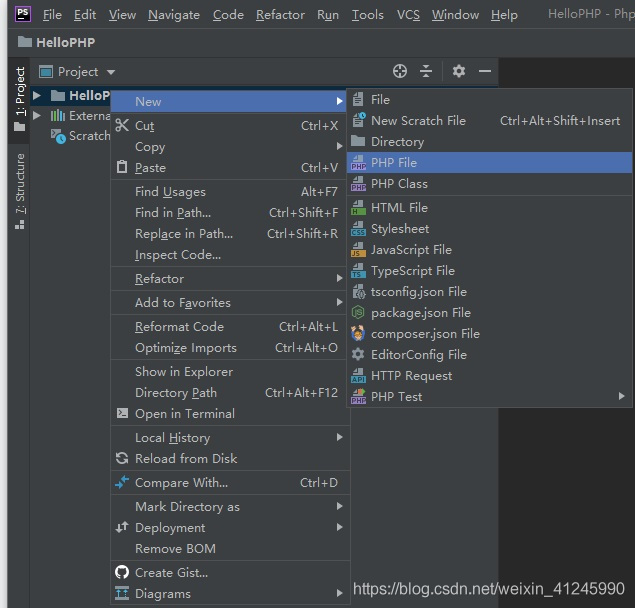
3.4、创建PHP文件
选择工程,单击右键->New->PHP File
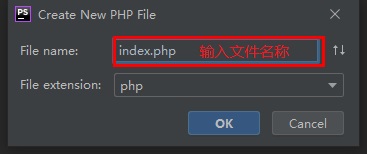
输入文件的名称,点击确定增加PHP文件
在新建的文件里输入代码:
<?php
  回声“你好PHP !“//在页面上输出“你好PHP !”
  phpinfo ();//调用PHP内置的函数显示PHP的基本信息
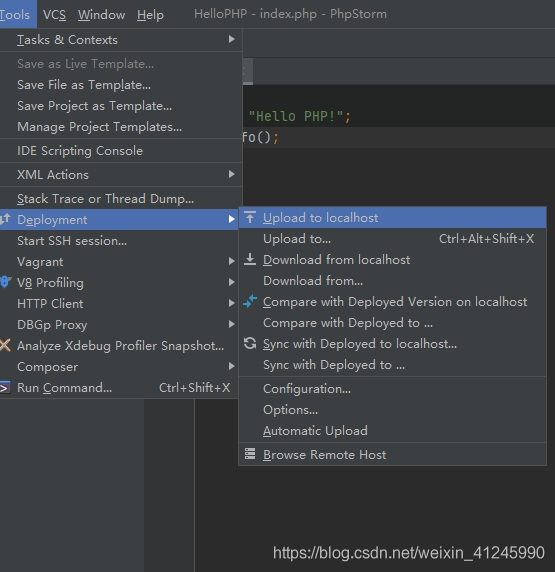
3.5,部署工程
在菜单中选择工具→开发→上传本地主机上传工程。
上传成功后,下方控制台显示上传的具体信息:

我们在phpstudy的www/HelloPHP目录下可以找到刚才上传的指数。php文件


