介绍
这篇文章给大家介绍如何在python中使用matplotlib库绘图,内容非常详细,感兴趣的小伙伴们可以参考借鉴,希望对大家能有所帮助。
首先介绍绘图时常用的基础命令:
1. plt.plot (x, y)即为绘图命令。
①基础画图:
plt.plot (x, y) ②设置颜色:
颜色属性
如果没有特别要求的话可以不手动设置颜色,如果要在一张图上画不同的线时,会自动分配颜色。也可以使用斧子。情节效果相同。
plt.plot (x, y,, color =, & # 39;红色# 39;) ③设置线型:
线型属性
可以选择& # 39;& # 39;,“& # 39;,”——# 39;公司,”:& # 39;“没有# 39;,& # 39;& # 39;‘& # 39;固体# 39;,“冲# 39;‘dashdot& # 39;, & # 39;点缀# 39;这些类型的。
plt.plot (x, y,, lineStyle =, & # 39; dashdot& # 39;) ④设置标注类型:
标记属性
有不同的标记可以选择,比如& # 39;o # 39;, & # 39; * & # 39;,“x # 39;。
plt.plot (x), y ,标志=& # 39;x # 39;) ⑤设置图例:
标签属性。
plt.plot (x), y ,标志=& # 39;o # 39;,标签=& # 39;语文成绩& # 39;)
plt.plot (x,, y ,标志=& # 39;* & # 39;,标签=& # 39;数学成绩& # 39;)
plt.plot (x,, y ,标志=& # 39;x # 39;,标签=& # 39;英语成绩& # 39;) 只是这样图例是不会显示的,还需要加上loc是位置设置,具体见后面讲解。
plt.legend (loc=& # 39; upper 左# 39;) 三,正常显示中文:
①windows系统:
plt.rcParams [& # 39; font.family& # 39;],=,(& # 39;无衬线# 39;】
plt.rcParams [& # 39; font.sans-serif& # 39;],=, (& # 39; SimHei& # 39;] mac系统:
这里是这样设置的,也可以设置为其他中文字体。
plt.rcParams [“font.family"],=, & # 39; Arial Unicode 女士# 39; ②正常显示符号:
plt.rcParams [& # 39; axes.unicode_minus& # 39;],=,假 四,设置图样或子图
①如果只画一张图的话可以,figsize设置的是x轴和y轴方向图片大小的比例。这里要设置好否则可能会出现图片显示不完全的情况,如果通过savefig命令保存的话,也是按照这个比例来保存的图片。
f =, plt.figure (figsize=(8, 6)) 或是,虽然是通过次要情节命令,可是不指定nrows和ncols默认只有一个子图。
f, ax =, plt.subplots (figsize=(8, 6)) ax表示的是当前坐标轴。
ax =, plt.gca () 如果有多个子图的话:
nrows为行,ncols为列,figsize为图片的尺寸。
f, ax =, plt.subplots (nrows=2, ncols=1, figsize=(8, 6), facecolor=& # 39;白色# 39;)或是
fig =, plt.figure ()
时间=ax1 fig.add_subplot (2, 1, 1)
时间=ax2 fig.add_subplot (2, 1, 2)
ax1.plot (x, y)
ax2.plot (x, z) 或是
ax1 =, plt.subplot (2, 1, 1)
时间=ax2 plt.subplot (2, 1, 2)
ax1.plot (x, y)
ax2.plot (x, z) 其他属性:第一个属性标记的是窗口的名称,dpi设置的分辨率。
f =, plt.figure(& # 39;成绩窗口& # 39;,figsize=(8, 6), facecolor=& # 39;白色# 39;,dpi=100) 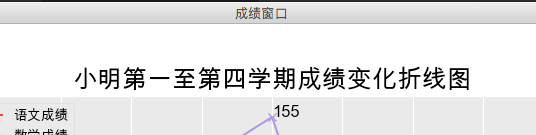
②设置图片背景色:
f =, plt.figure (figsize=(8, 6), facecolor=& # 39;蓝# 39;) 
如果要设置图片前景色,要用
ax.set (facecolor=& # 39;白色# 39;) 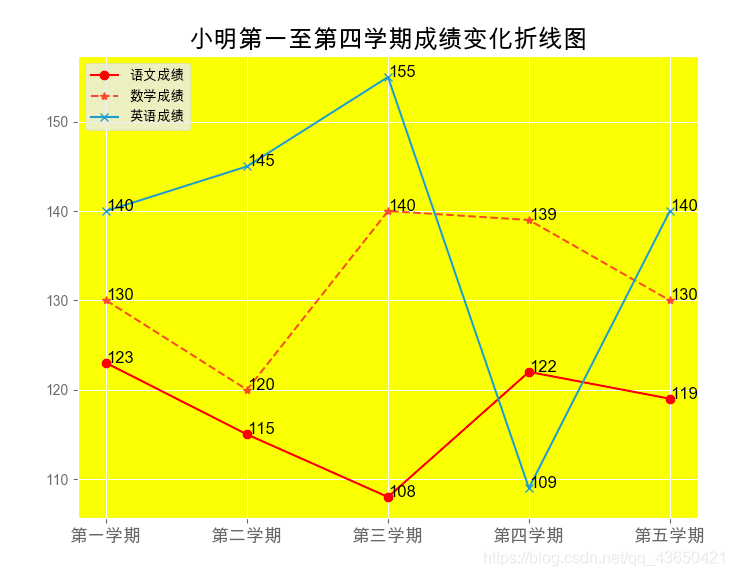
五,设置x轴或y轴相关属性:
①设置x轴的刻度:
需要指定标注的位置,标注的具体值,可以通过字形大小指定大小。
x =, (0、2、4、6、8)
x_label =,(& # 39;第一学期& # 39;,& # 39;第二学期& # 39;,& # 39;第三学期& # 39;,& # 39;第四学期& # 39;,& # 39;第五学期& # 39;】
plt.xticks (x,, x_label字形大?13) 这里的xticks支持乳胶,
x_label =, (" # 39; e x ^ & # 39;美元," # 39;美元x_1 ^ 2 $ & # 39;, " # 39; \λ& # 39;美元," # 39;美元\压裂{1}{2}$ & # 39;," # 39;\π& # 39;美元)