介绍
这篇文章将为大家详细讲解有关怎么在react-native中利用leanclound实现一个消息推送功能,文章内容质量较高,因此小编分享给大家做个参考,希望大家阅读完这篇文章后对相关知识有一定的了解。
<强>接入leanclound
<强> 1。首先需要创建一个react-native项目
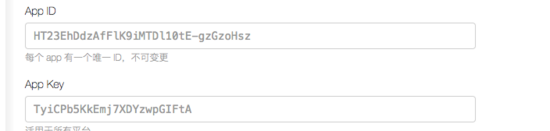
react-native init projectName <强> 2。在leancloud创建一个同名项目,并记录好appid和appkey
<强> 3。项目创建成功后,安装推送所需的模块(需要cd到工程目录)
1。使用纱安装
yarn add leancloud-storage
yarn add leancloud-installation 2。使用npm安装
npm install leancloud-storage ——保存
npm install leancloud-installation ——拯救 <强> 4。在项目目录下新建一个文件夹,名字为pushservice,在里面添加一个js文件PushService.js,处理消息推送的逻辑,
1。在索引。js初始化leanclound
import AV 得到& # 39;leancloud-storage& # 39;
…/*
*添加注册的appid和appkey
*/const appId =, & # 39; HT23EhDdzAfFlK9iMTDl10tE-gzGzoHsz& # 39;
const appKey =, & # 39; TyiCPb5KkEmj7XDYzwpGIFtA& # 39;/*
*初始化
*/AV.initialize (appId appKey);/*
*把安装设为全局变量,在其他文件方便使用
*/global.Installation =,需要(& # 39;leancloud-installation& # 39;) (AV);
… 2。iOS端配置
首先,在项目中引入RCTPushNotification,详情请参考:链接库——反应本地文档
步骤一:将PushNotification项目拖到iOS主目录,PushNotification路径:当前项目/node_modules react-native/图书馆/PushNotificationIOS目录下
步骤二:添加libRCTPushNotification静态库,添加方法:工程Targets-Build Phases-link二进制文件和库点击添加,搜索libRCTPushNotification。一个并添加
步骤三:开启推送功能,方法:工程Targets-Capabilities找到推送式通知并打开
步骤四:在Appdelegate。米文件添加代码
# import & lt;反应/RCTPushNotificationManager.h>
…//注册推送通知
- (void)应用程序:(UIApplication *) application didRegisterUserNotificationSettings: (UIUserNotificationSettings *) notificationSettings {
,[RCTPushNotificationManager didRegisterUserNotificationSettings notificationSettings):;
}//,Required for 从而register 事件。
安康;(空白)应用程序:(UIApplication *) application didRegisterForRemoteNotificationsWithDeviceToken: deviceToken (NSData *)
{
,
,[RCTPushNotificationManager didRegisterForRemoteNotificationsWithDeviceToken deviceToken):;
}//,Required for 从而notification 事件只你must call 从而completion handler after handling 从而remote 通知。
安康;(空白)应用程序:(UIApplication *) application didReceiveRemoteNotification: (NSDictionary *)用户信息
fetchCompletionHandler:(void (^) (UIBackgroundFetchResult)) completionHandler
{
,NSLog (@"收到通知:% @",用户信息);
,[RCTPushNotificationManager didReceiveRemoteNotification: userInfo fetchCompletionHandler: completionHandler);
}//,Required for 从而registrationError 事件。
安康;(空白)应用程序:(UIApplication *) application didFailToRegisterForRemoteNotificationsWithError: (NSError *)错误
{
,NSLog (@" error ==, % @",,,错误);
,(RCTPushNotificationManager didFailToRegisterForRemoteNotificationsWithError:错误);
}//,Required for 从而localNotification 事件。
安康;(空白)应用程序:(UIApplication *) application didReceiveLocalNotification: (UILocalNotification *)通知
{
,NSLog (@"接受通知:% @",通知);
,(RCTPushNotificationManager didReceiveLocalNotification:通知);
} <强> 5。获取deviceToken,并将deviceToken插入到_Installation
找到PushService文件,编写代码
//引用自带PushNotificationIOS
const PushNotificationIOS =,要求(& # 39;react-native& # 39;) .PushNotificationIOS;
…
class PushService {
,//初始化推送
,init_pushService =,(),=祝辞,{//才能添加监听事件
PushNotificationIOS才能只addEventListener(& # 39;注册# 39;,this.register_push);//请才能求权限
PushNotificationIOS.requestPermissions才能();
,}
,//获取权限成功的回调=,register_push (deviceToken),=祝辞,{//才能判断是否成功获取到devicetoken
if 才能;(deviceToken), {
,,this.saveDeviceToken (deviceToken);
,,},
,}
,//保存devicetoken安装到表中=,saveDeviceToken (deviceToken),=祝辞,{
global.Installation.getCurrent才能()
,,不要犹豫(installation =祝辞,{
,,installation.set (& # 39; deviceType& # 39;,, & # 39; ios # 39;);
,,installation.set (& # 39; apnsTopic& # 39;,, & # 39;工程bundleid& # 39;);
null
null
null
null
null
null
null
null
null
null
null
null
null
null
null
null
null
null
null
null
null
null
null
null
null
null
null
null
null
null
null
null
null
null
null
null
null
null
null
null
null
null
null
null
null
null
null
null
null
null
null
null
null
null
null
null
null
null
null
null
null
null
null
null
null
null
null
null
null
null
null
null