[root@localhost ~] #, cp -r grafana-zabbix zabbix/,,/usr/share/grafana/公共/app/插件/数据源/
二,登录Grafana并且配置
,,,, 1, http://ServerIP: 3000/登录

,,,,,,,输入默认用户名和密码,用户名:admin,密码:管理,点击登录

,,,,,,,按如下配置
,,,,,,,【主意1】Zabbix的API地址为“http://ServerIP/zabbix/api_jsonrpc。php”,其中IP的安装zabbix服务器的服务器IP
,,,,,,,【主意2】Zabbix的API账号密码就是Zabbix的Web端登录账号和密码,账号:admin,密码Zabbix

,,,,,,,点击添加后,点击测试连接测试是否可以连接。提示“成功”说明连接成功,点击保存

,,,,,,,点击仪表板,去主目录设置,点击新的,新建一个家

,,,,,,,新建一个图

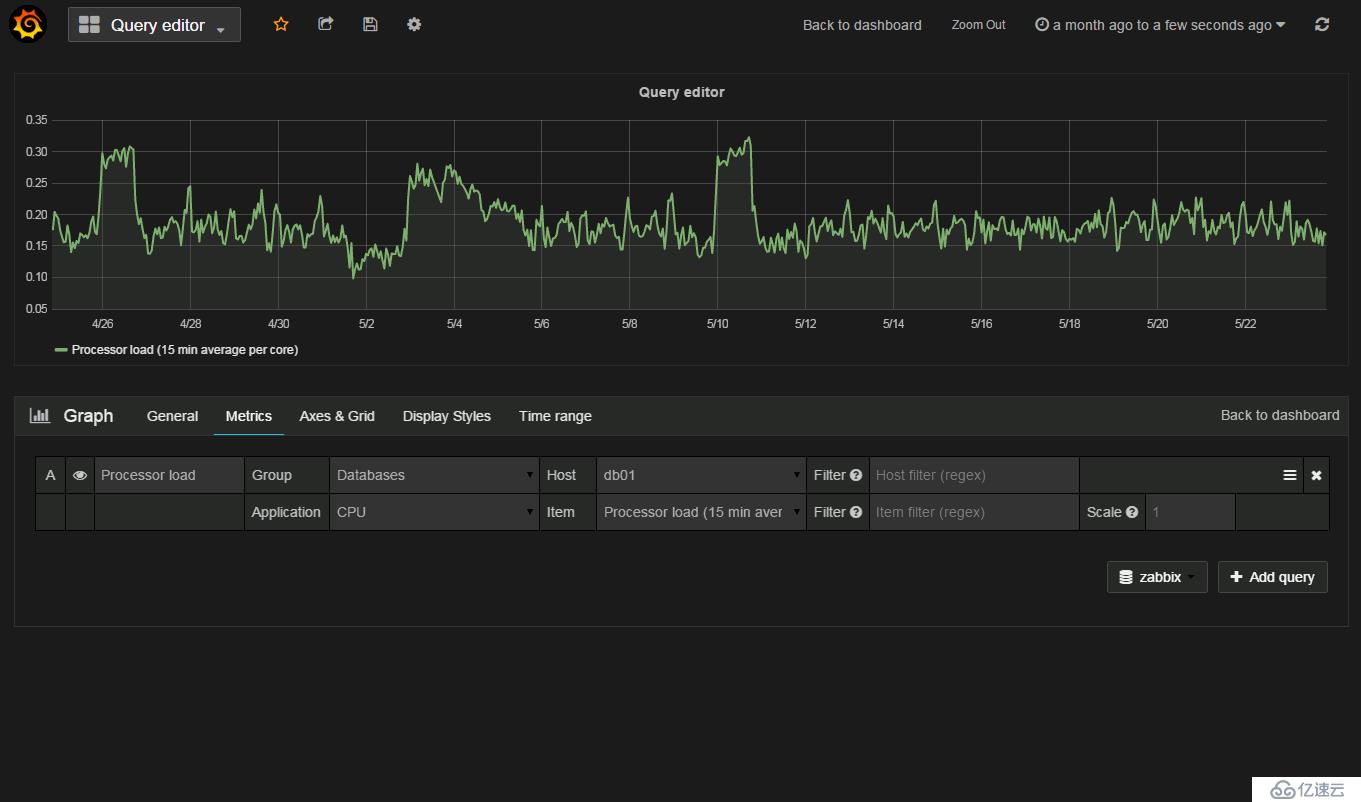
,,,,,,,点击下列红框处→选择编辑→选择数据库ZabbixClient

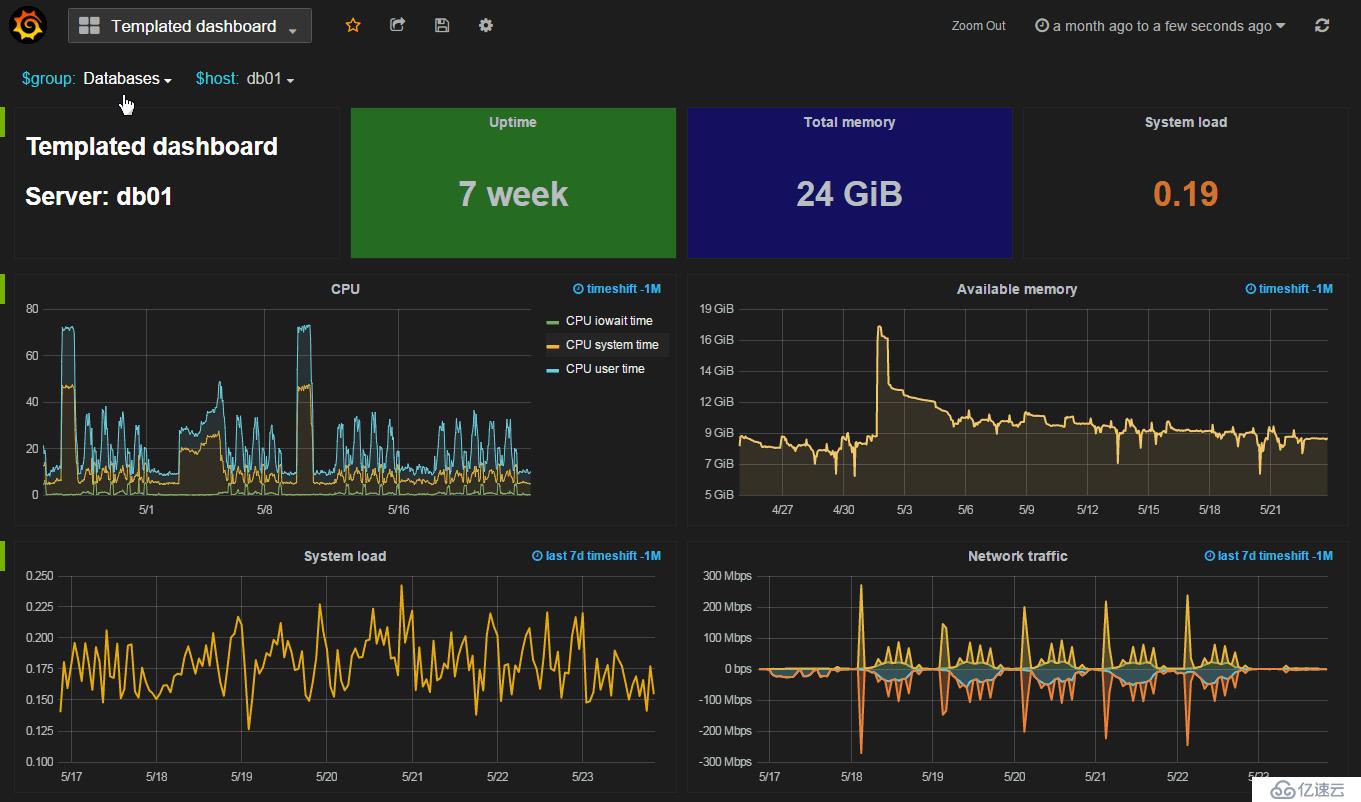
,,,,,,,然后配置一下,就可以出现华丽丽的数据了,下图都是官方的示意图: