<强>第一步:安装filebeat
参考:https://www.elastic.co/guide/en/beats/filebeat/current/filebeat-installation.html
<强>第二步:filebeat目录说明
<代码>类型描述的位置
家里的Filebeat安装。{extract.path}
本二进制文件的位置。{extract.path}
配置配置文件的位置。{extract.path}
数据持久数据文件的位置。{extract.path}/数据
日志由Filebeat日志的位置。 之前
<强>第三步:filebeat配置
默认配置文件为filebeat。yml
内容为:
# # # # # # # # # # # # # # # # # # # # # # Filebeat配置示例# # # # # # # # # # # # # # # # # # # # # # # # #
#这个文件是一个示例配置文件高亮显示>
<李>结合自定义路径配置下的文件ceshi.yml
<代码> -类型:日志
道路:
——/var/log/zookeeper/zookeeper.log
标签(“管理员”):
exclude_files (. gz和美元”):
scan_frequency: 1
字段:
server_name:主机名
out_topic:“zookeeper_log”
多行:
模式:“^ \ \ S”
匹配:
类型:日志
道路:
——/var/log/nginx/access.log
标签(“nginx”):
exclude_files (. gz和美元”):
scan_frequency: 1
字段:
server_name:主机名
out_topic:“nginx_log”
多行:
模式:“^ \ \ S”
匹配:在
上边这块我们抓取了动物园管理员日志和nginx日志,定义索引名称分别为zookeeper_log和nginx_log
<强>第五步:启动filebeat并在es中查看生成的索引
。/filebeat - e - c filebeat - 123。yml
去es中查看索引
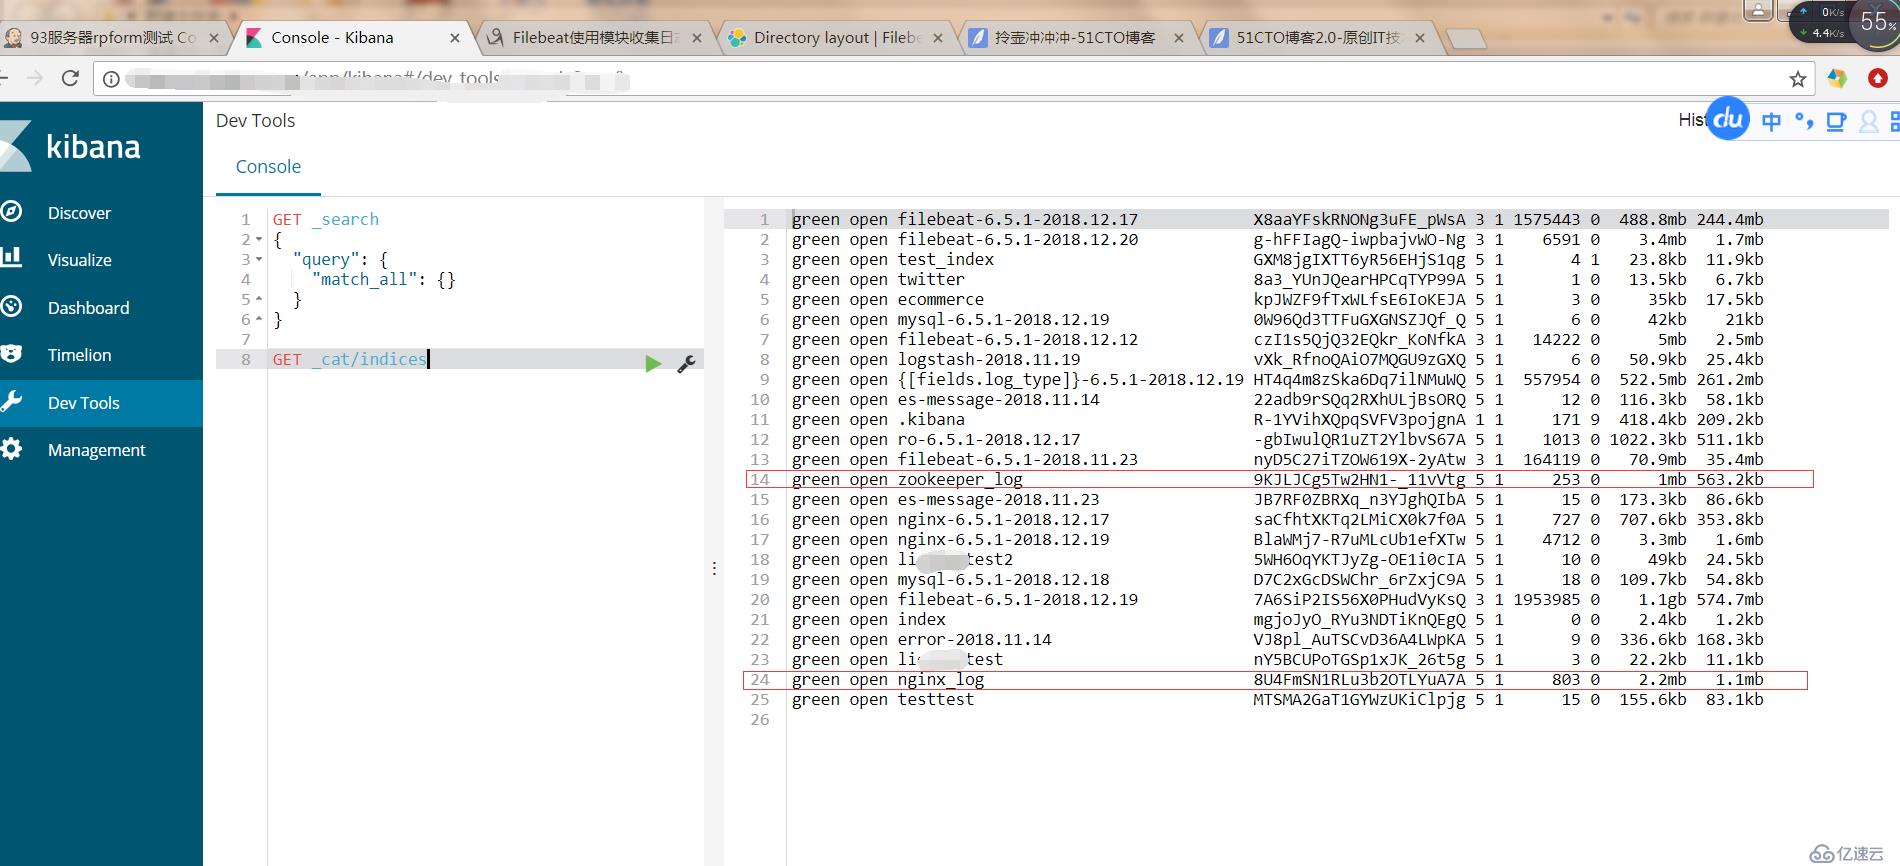
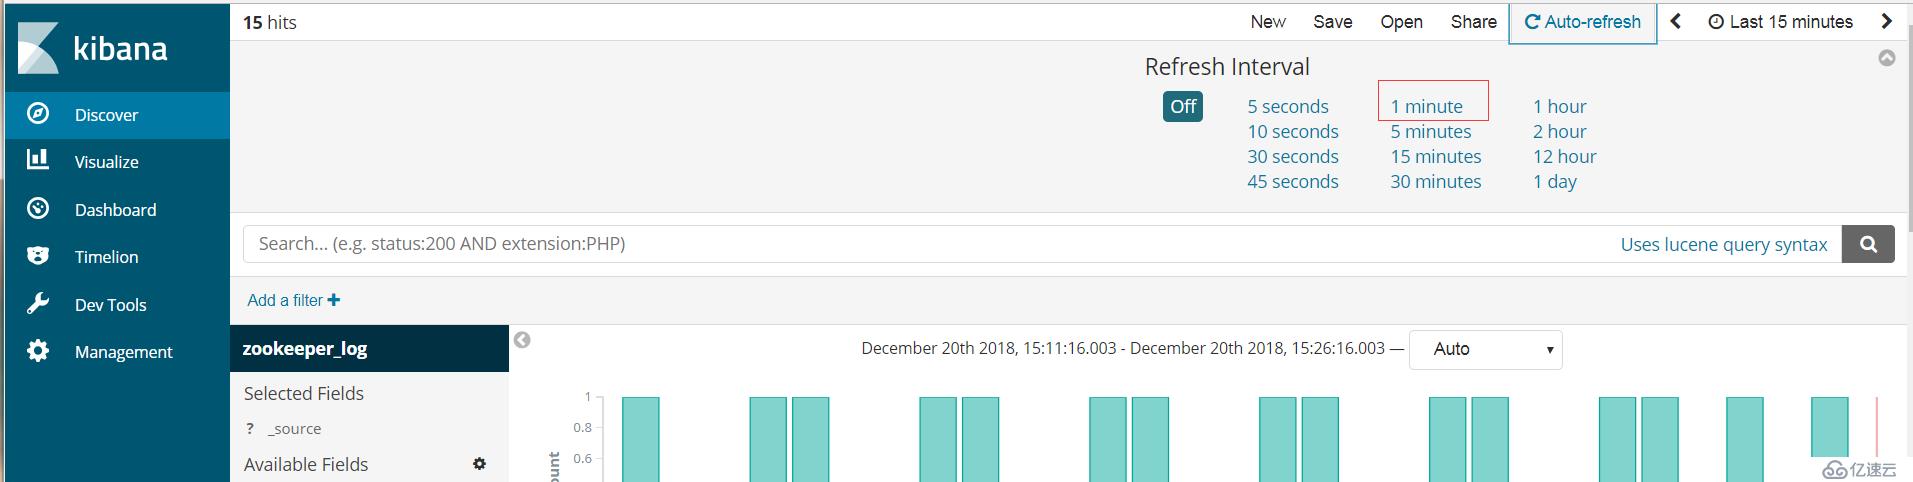
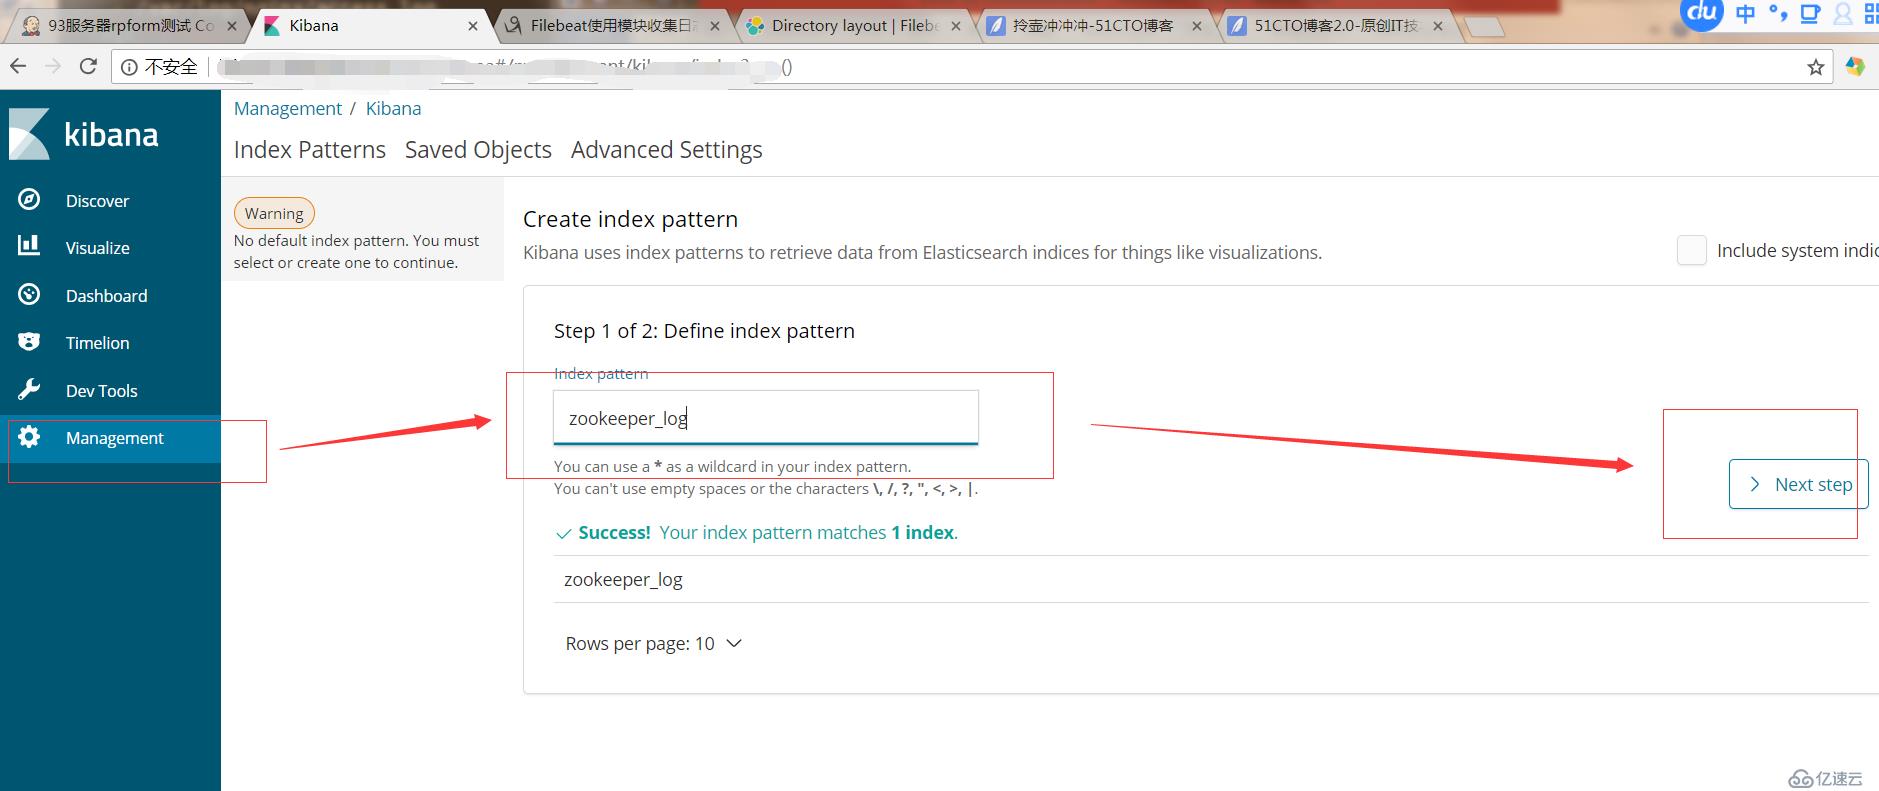
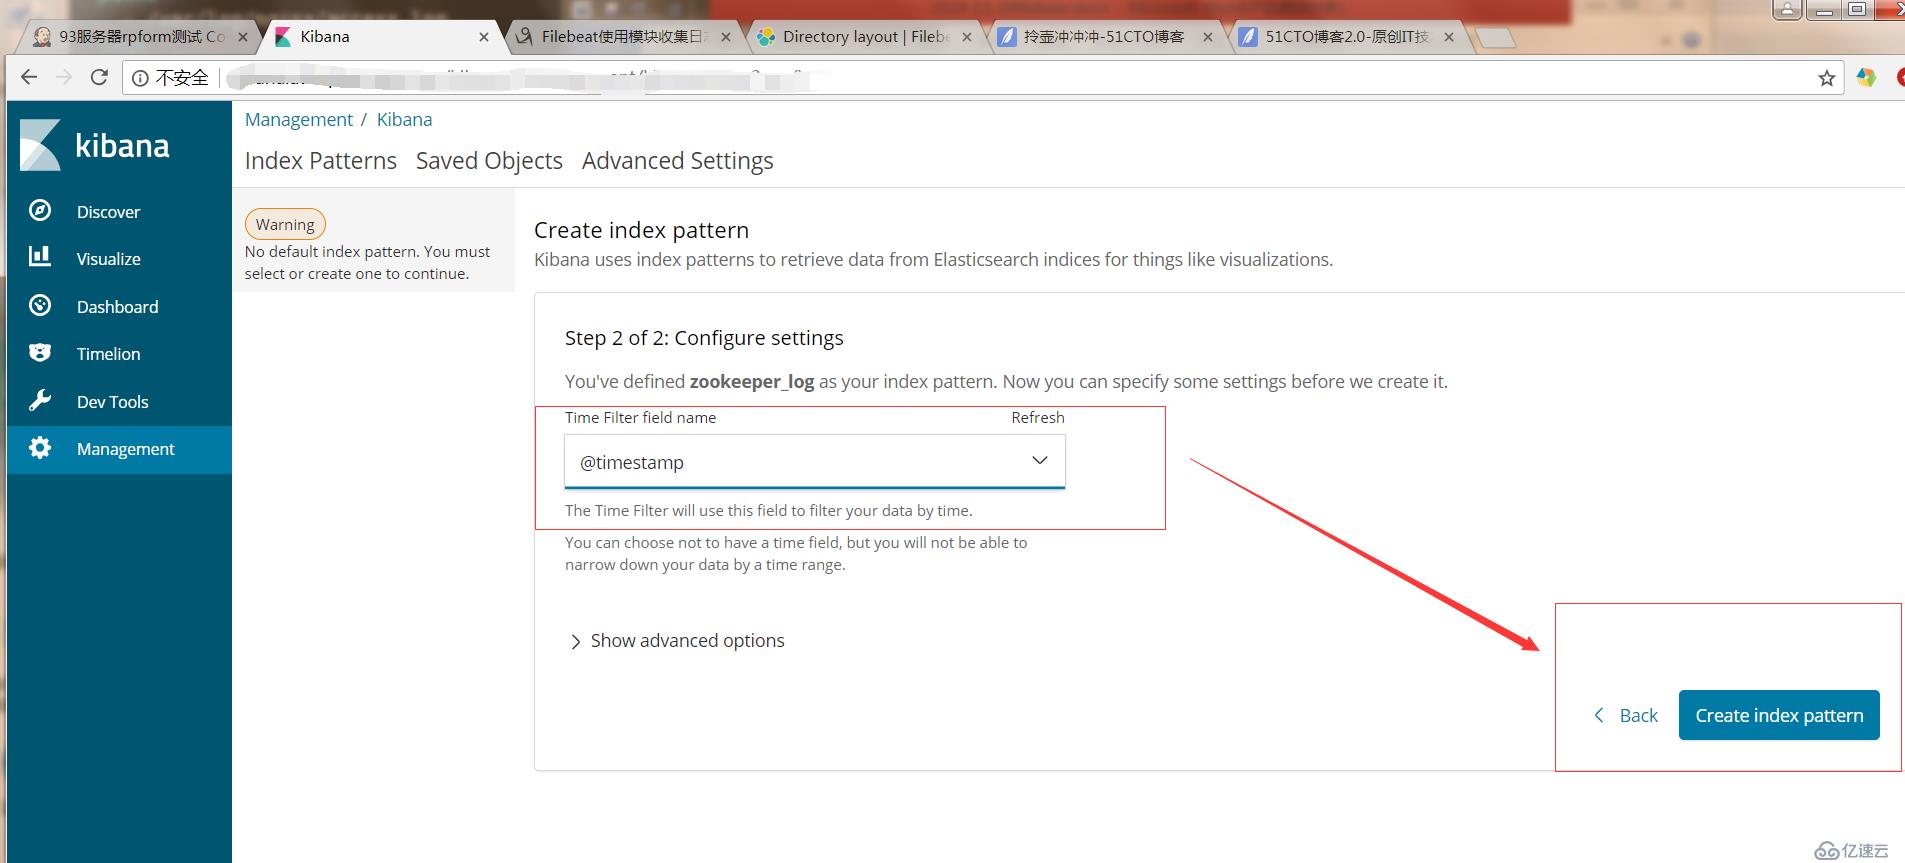
在es中已生成nginx_log和zookeeper_log索引,我们在kibana中去查看索引中的内容
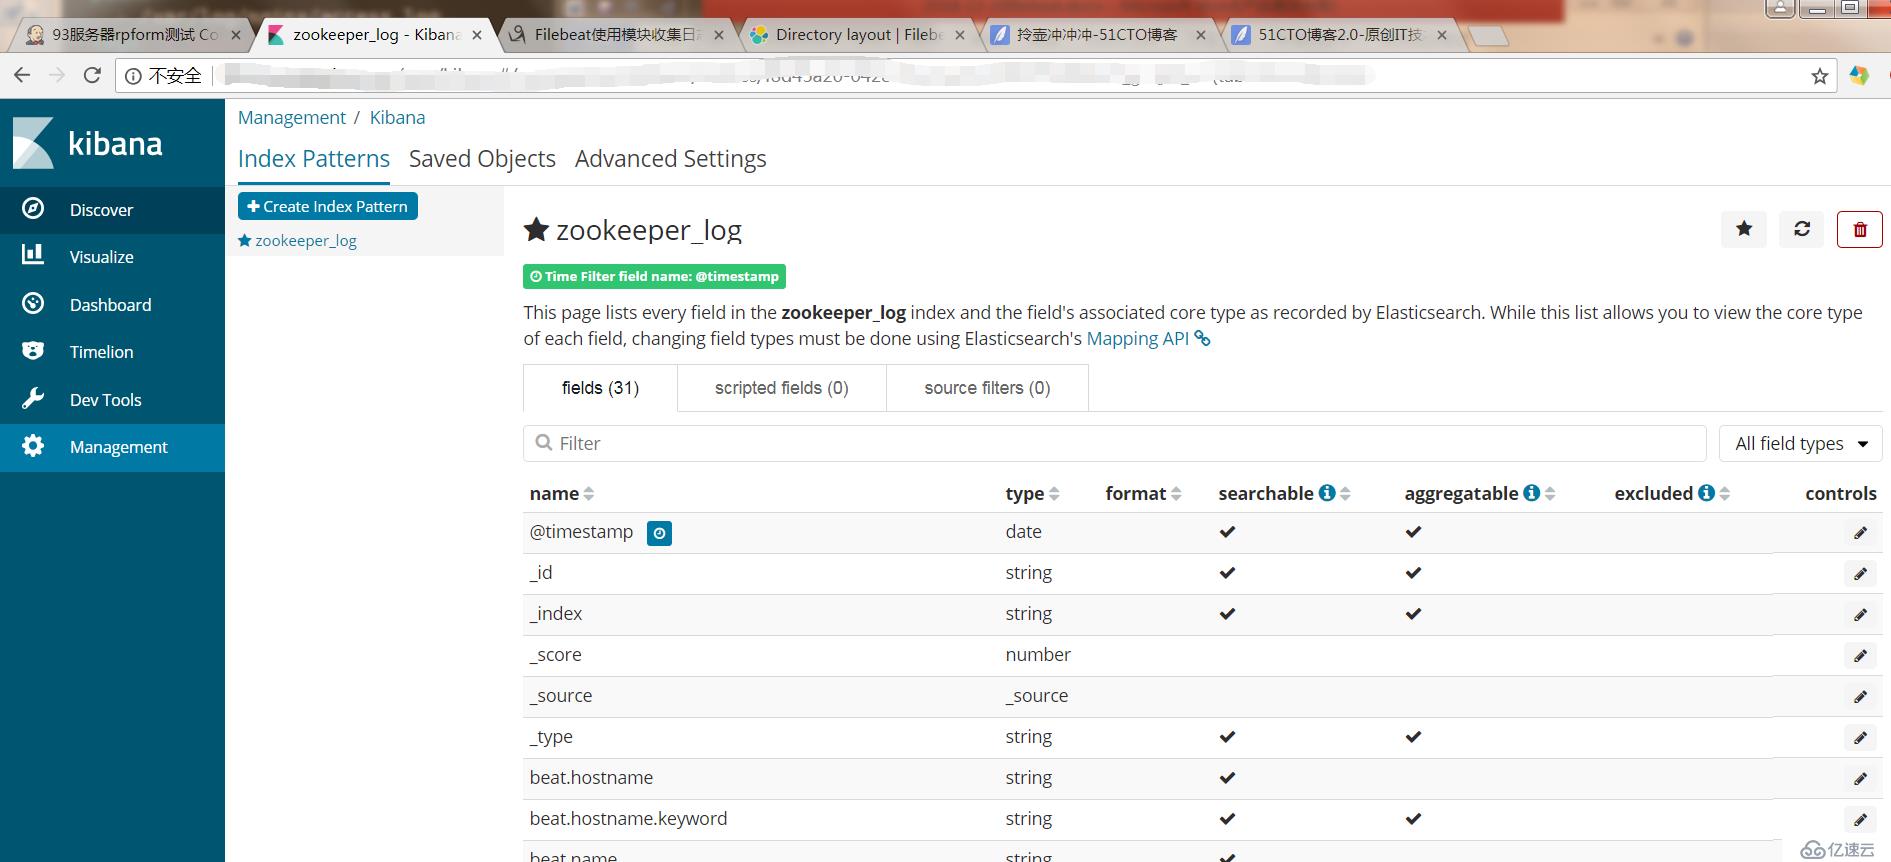
我看看到zookeeper_log索引里边已经有实时日志在跑,那么怎么自动让他更新呢。