介绍 & lt; ? xml version=?.0“,编码=癠TF-8" ?比;
& lt; project xmlns=癶ttp://maven.apache.org/POM/4.0.0", xmlns: xsi=癶ttp://www.w3.org/2001/XMLSchema-instance"
,,xsi: schemaLocation=? http://maven.apache.org/POM/4.0.0 , http://maven.apache.org/xsd/maven-4.0.0.xsd"比;
,& lt; modelVersion> 4.0.0
,& lt; parent>
& lt;才能groupId> org.springframework.boot</groupId>
& lt;才能artifactId> spring-boot-starter-parent</artifactId>
& lt;才能version> 2.1.4.RELEASE</version>
& lt;才能relativePath/祝辞,& lt; !——, lookup parent 得到repository ——比;
,& lt;/parent>
,& lt; groupId> com.laowang
,& lt; artifactId> sptest
,& lt; version> 0.0.1-SNAPSHOT
,& lt; name> sptest
,& lt; description> Demo project for Spring Boot
,& lt; properties>
& lt;才能java.version> 1.8 & lt;/java.version>
,& lt;/properties>
,& lt; dependencies>
& lt;才能dependency>
,,& lt; groupId> org.springframework.boot
,,& lt; artifactId> spring-boot-starter-web
& lt;才能/dependency>
& lt;才能dependency>
,,& lt; groupId> org.springframework.boot
,,& lt; artifactId> spring-boot-starter-test
,,& lt; scope> test
& lt;才能/dependency>
,& lt;/dependencies>
,& lt; build>
& lt;才能plugins>
,,& lt; plugin>
,,,& lt; groupId> org.springframework.boot
,,,& lt; artifactId> spring-boot-maven-plugin
,,& lt;/plugin>
& lt;才能/plugins>
,& lt;/build>
& lt;/project> package com.laowang.sptest;
import org.springframework.boot.SpringApplication;
import org.springframework.boot.autoconfigure.SpringBootApplication;
@SpringBootApplication
public class SptestApplication {
,public static void main (String [], args), {
SpringApplication.run才能(SptestApplication.class, args);
,}
} package com.laowang.sptest.controller;
import org.springframework.stereotype.Controller;
import org.springframework.web.bind.annotation.RequestMapping;
import org.springframework.web.bind.annotation.ResponseBody;
import java.util.HashMap;
@ controller
public class HelloController {
,@RequestMapping (“/?
,@ResponseBody
,public String getHello (), {
return 才能“hello";
,}
}
怎么快速搭建一个springboot项目?针对这个问题,这篇文章详细介绍了相对应的分析和解答,希望可以帮助更多想解决这个问题的小伙伴找到更简单易行的方法。
1。问题描述
springboot的面世,成为Java开发者的一大福音,大大提升了开发的效率,其实springboot只是在maven的基础上,对已有的maven gav进行了封装而已,今天用最简单的代码快速入门springboot。
2。解决方案
强烈推荐大家使用的想法付费版(破解感谢下蓝宇),想法对maven, git等插件支持的更加好。
使用想法自带的春天Initializr(实际调用的是springboot的官网上的Initializr),快速新建springboot项目。
2.1新建springboot项目
(1)文件→新建→项目
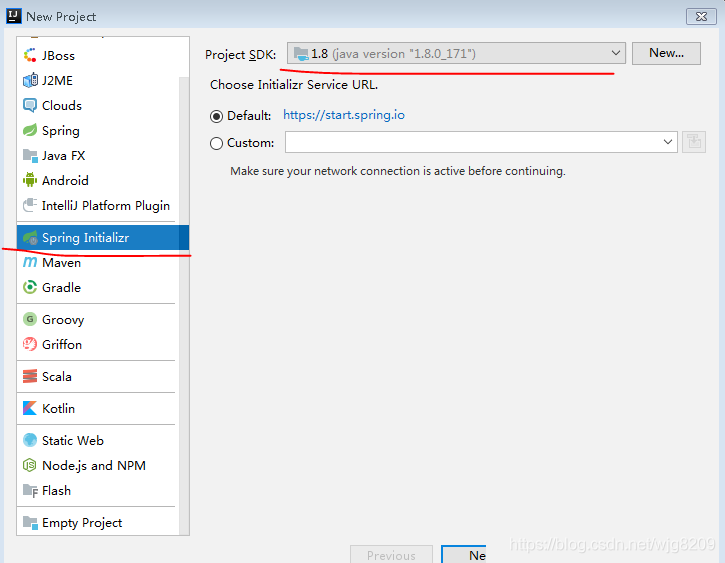
(2)点击下(第一个)
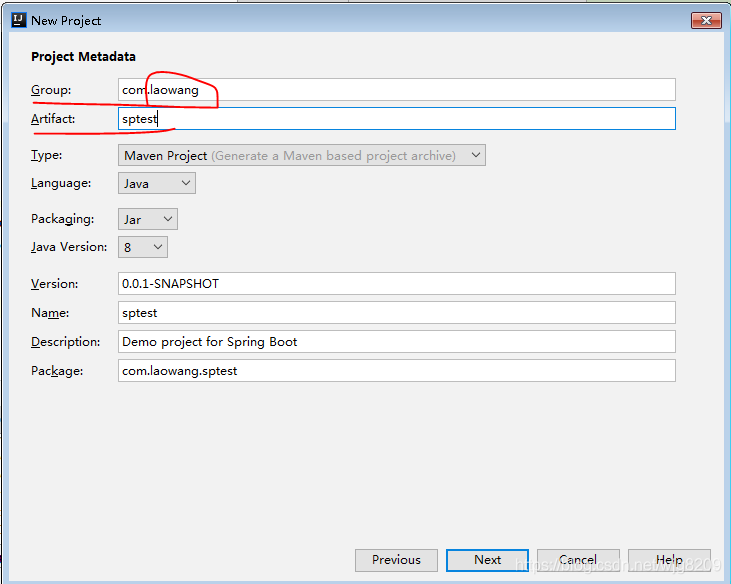
创建springboot项目(因为连接的国外的网站,下有时会几秒的延迟),将两个值改成自己的配置,组:com。老王,工件:spt,其他可以不用动,点击好
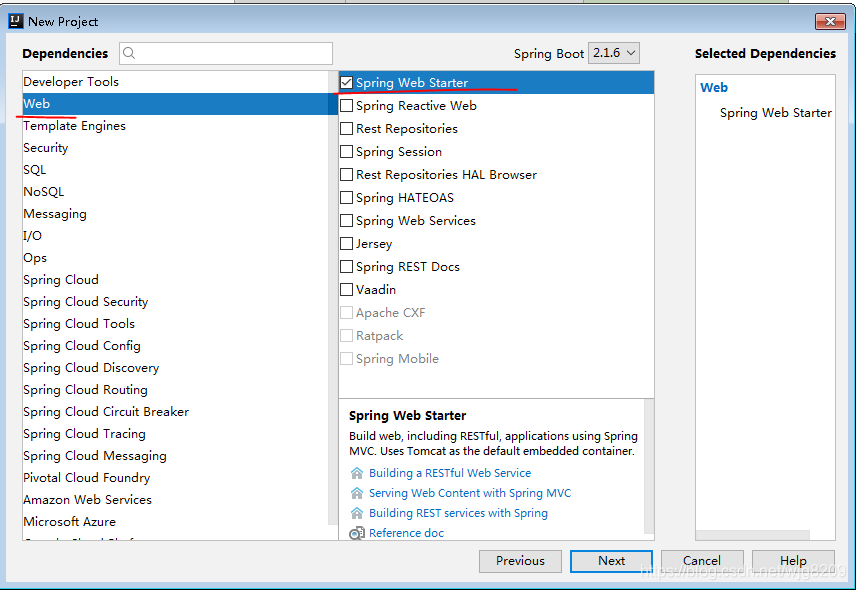
(3)点击下(第二个)
选择web - spring web起动器》
(4)点击下(第三个)
不用做修改,直接完

新建springboot项目已经完成。
2.2 springboot默认生成三个文件
默认生成的三个文件
2.2.1。砰的一声。xml
重点就一个gav: spring-boot-starter-web,其他可以删除。
2.2.2 application.properties
该文件默认为空,springboot的默认启动端口号:8080,可以在改文件修改。
2.2.3启动类文件(SptestApplication。java)
<强>重点是标签:@SpringBootApplication
2.3验证springboot
在com.laowang。spt报下新建ctroller包,并新建类:HelloController