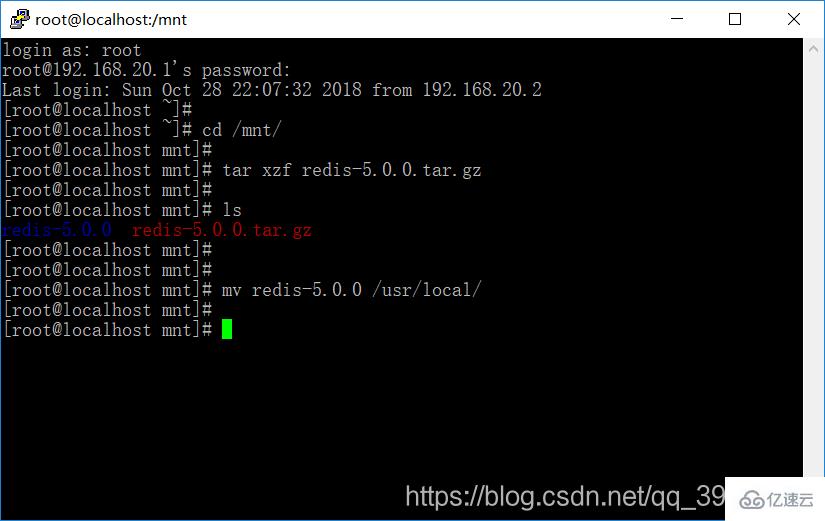
介绍 [root@localhost ~] #, cd /mnt/,,,,,,,//进入mnt文件目录
,
[root@localhost mnt] #, tar xzf redis-5.0.0.tar.gz ,,,//解压复述
,
[root@localhost mnt] #, ls ,,,,,,,,,,//查看mnt目录
redis-5.0.0 redis-5.0.0.tar.gz
[root@localhost mnt] #, mv redis-5.0.0 /usr/地方/,,,//把redis-5.0.0移动到/usr/地方/,目录下 [root@localhost mnt] #, yum install gcc-c + + //进入到/usr/地方/redis-5.0.0/,文件目录下
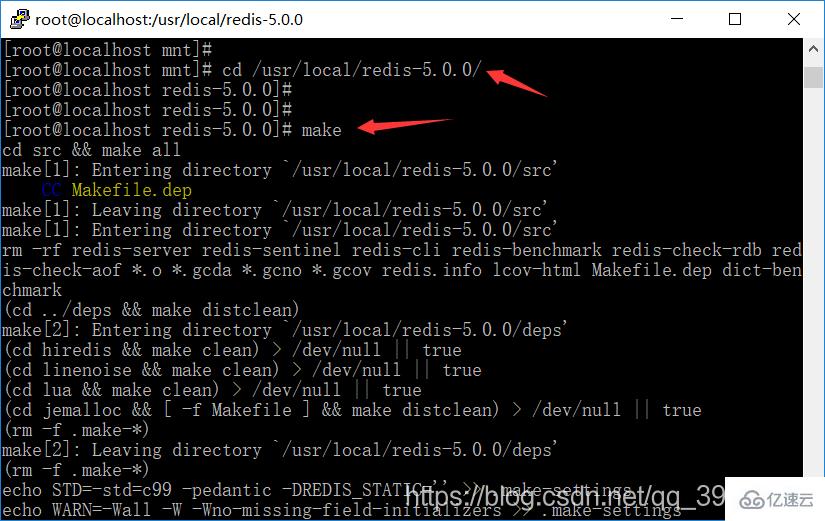
[root@localhost mnt] #, cd /usr/地方/redis-5.0.0/,,,
[root@localhost redis-5.0.0] #, make ,,,,,//对解压后的文件进行编译
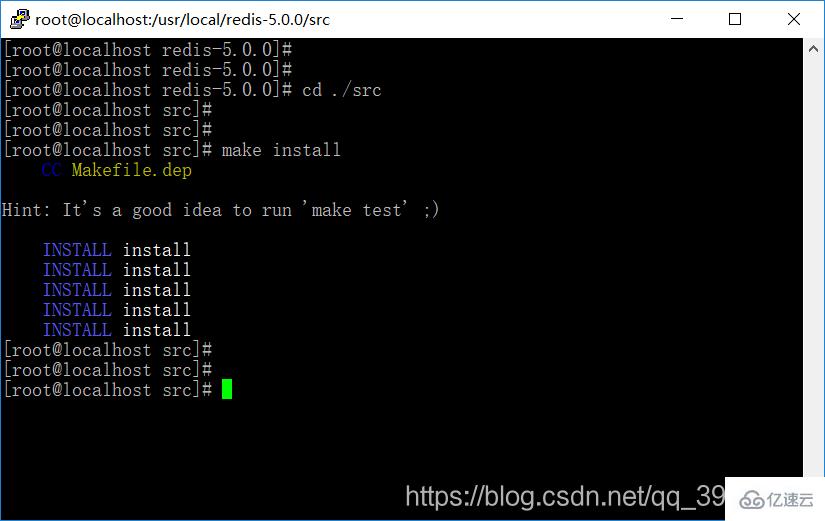
[root@localhost redis-5.0.0] #, cd 。/src ,,//进入到,redis-5.0.0/src 文件目录下
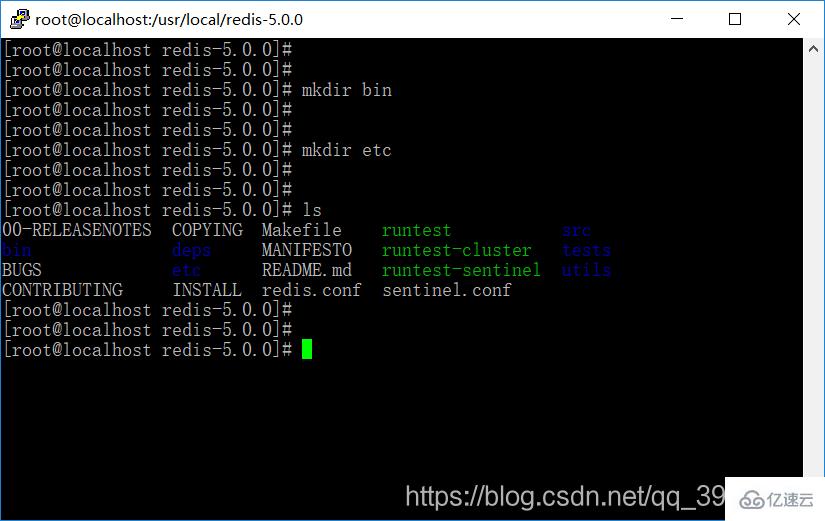
(root@localhost src) #, make install ,,,//进行复述,安装 [root@localhost redis-5.0.0] #, mkdir bin ,,,,,//创建本文件夹
[root@localhost redis-5.0.0] #, mkdir etc ,,//创建等文件夹 //将redis-5.0.0目录下的,redis.conf 移动到,redis-5.0.0目录下的src文件夹下
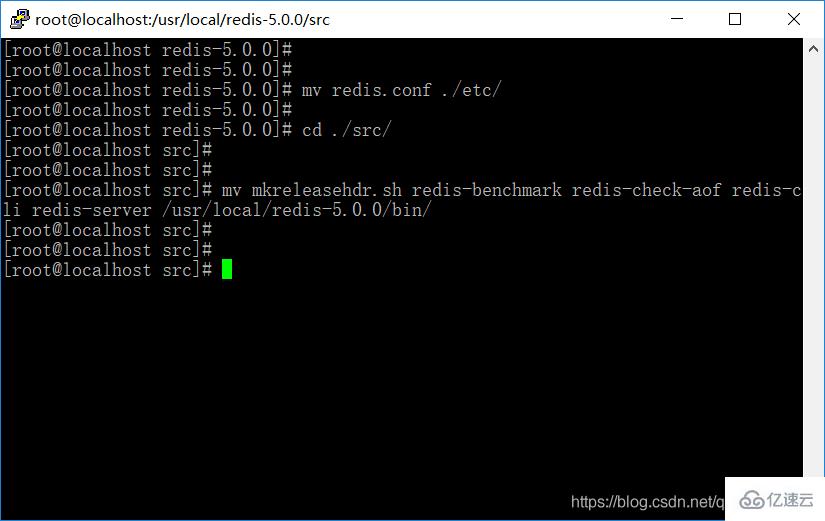
[root@localhost redis-5.0.0] #, mv redis.conf 。/etc/,,
[root@localhost redis-5.0.0] #, cd 。/src/,,,,,,//进入redis-5.0.0目录下的src文件夹下//将mkreleasehdr.sh, redis-benchmark、redis-check-aof redis-cli, redis-server 移动到,,,/usr/地方/redis-5.0.0/bin/,目录下
(root@localhost src) #, mv mkreleasehdr.sh redis-benchmark redis-check-aof redis-cli redis-server /usr/地方/redis-5.0.0/bin/ //进入到/usr/地方/redis-5.0.0/etc/,目录下
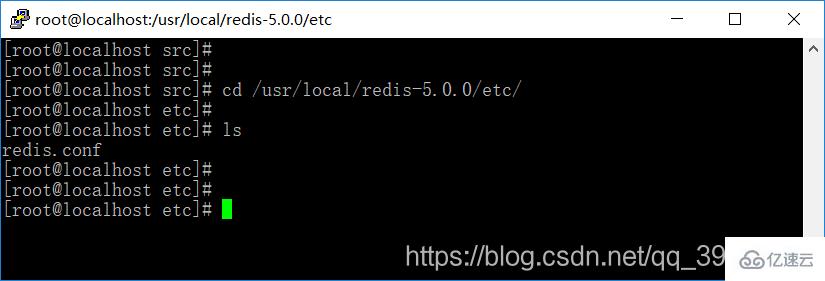
(root@localhost src) #, cd /usr/地方/redis-5.0.0/etc/,,,
,
(root@localhost 等等)#,ls ,,//查看等目录
复述。参看 (root@localhost 等等)#,vi 复述。参看
小编给大家分享一下Linux下安装复述的方法,相信大部分人都还不怎么了解,因此分享这篇文章给大家参考一下,希望大家阅读完这篇文章后大有收获、下面让我们一起去了解一下吧!
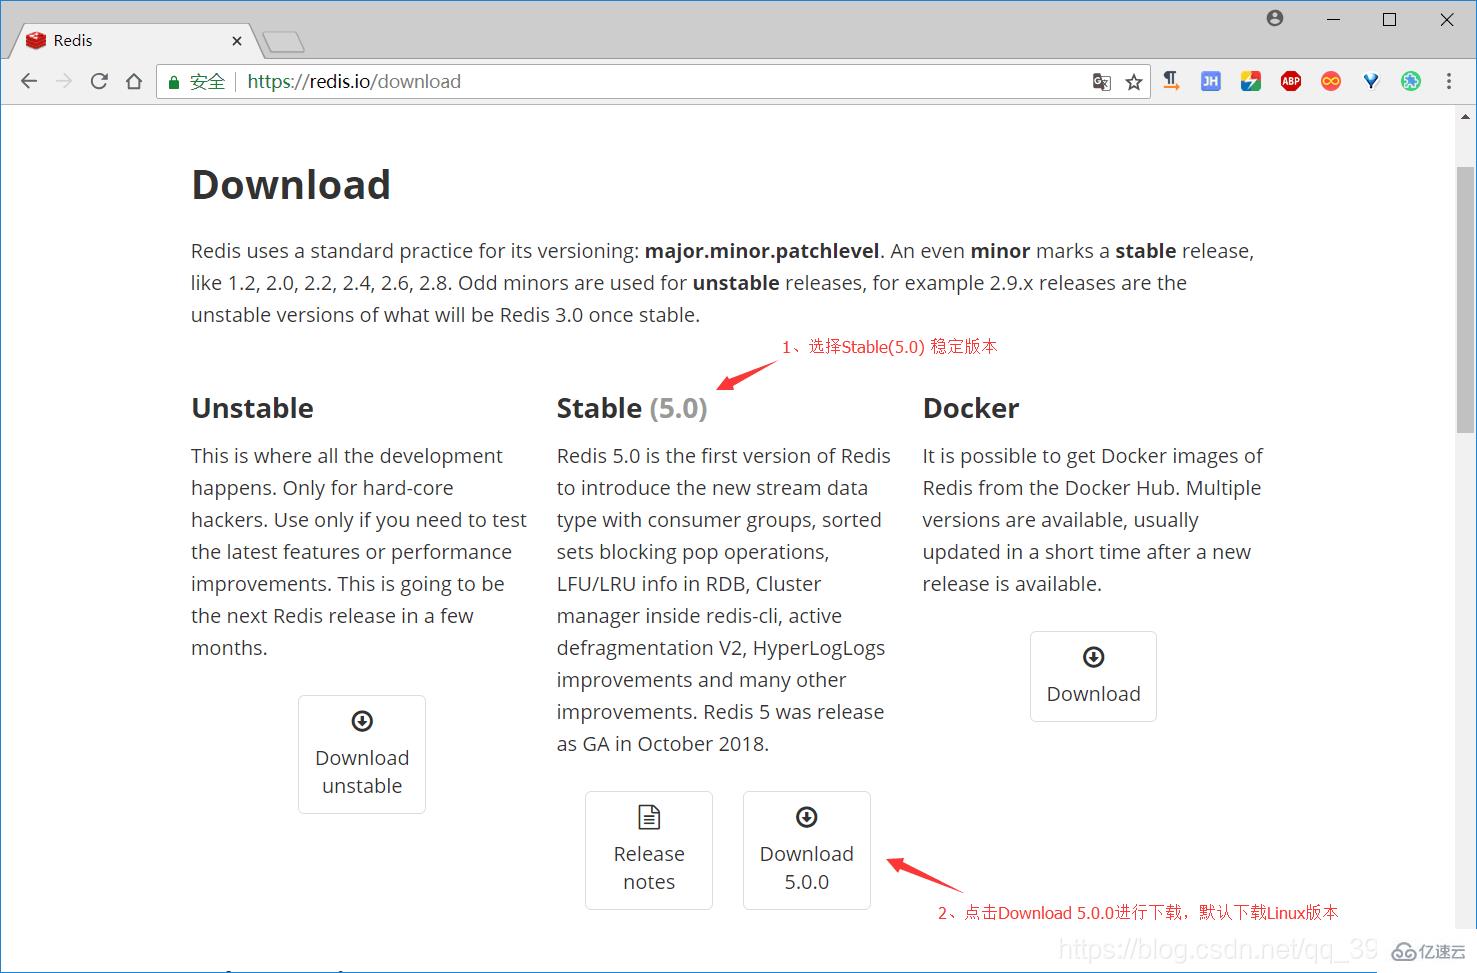
官网下载链接:https://redis.io/download
1,选择稳定(5.0)下的下载5.0.0链接进行下载(稳定是稳定版本,默认下载的是Linux版本)
<>强推荐(免费):复述,
2,下载完成之后,打开有WinSCP,把我们下载好的复述,压缩包,上传到Linux的/mnt/文件目录下
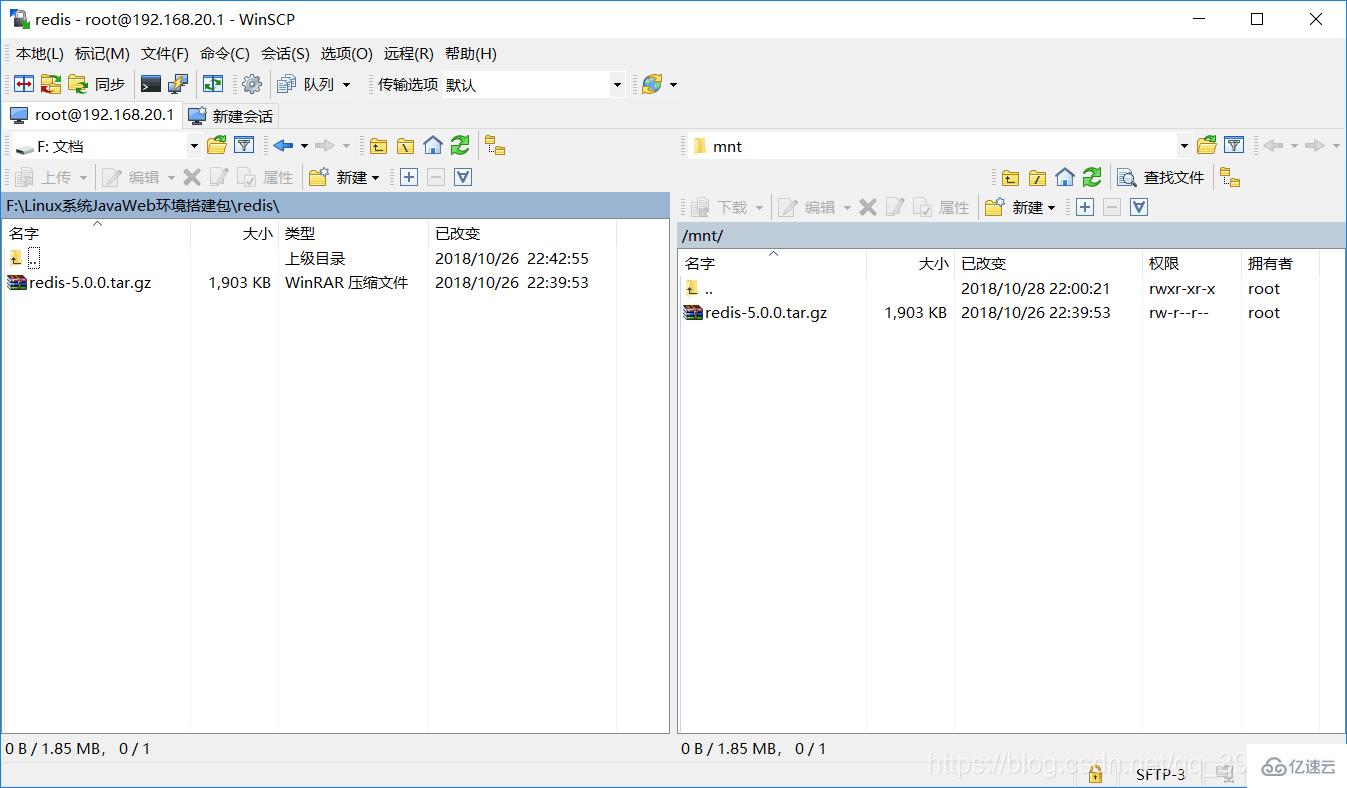
3,使用油灰连接到我们的Linux服务器,进入到/mnt/文件目录中,解压redis-5.0.0.tar.gz,并把redis-5.0.0移动到/usr/地方/目录下
4,安装gcc环境
由于复述,是由C语言编写的,它的运行需要C环境,因此我们需要先安装gcc。安装命令如下:
5,进入到,/usr/地方/redis-5.0.0/目录下,进行编译与安装
(1)对解压后的文件进行编译
(2)安装复述,
6,为了方便管理,将复述,文件中的设计及其配置文件和常用命令移动到统一文件中
(1)创建本和等文件夹
(2),将redis-5.0.0目录下的复述。参看移动到redis-5.0.0目录下的等文件夹下
将mkreleasehdr。sh、redis-benchmark redis-check-aof、redis-cli redis-server移动到,/usr/local/redis-5.0.0/bin/目录下
7,进入到/usr/地方/redis-5.0.0/etc/目录下
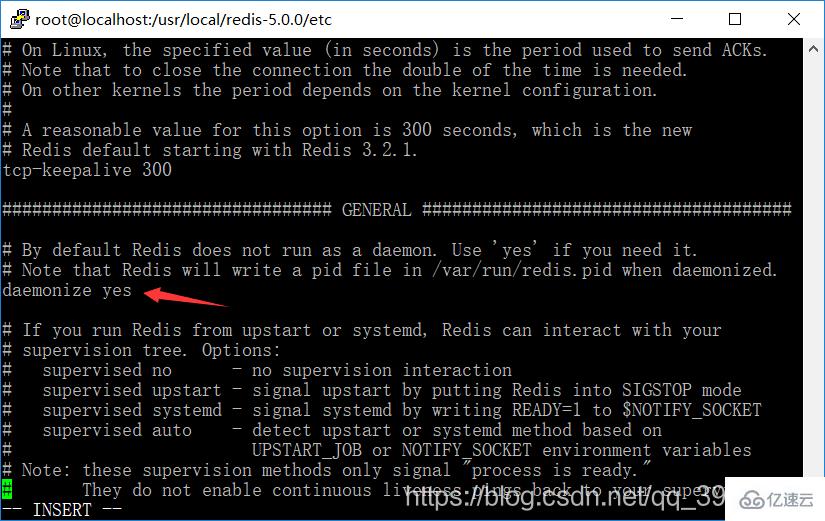
8,编辑复述。参看配置文件,设置后台启动复述,服务
把文件中的daemonize属性改为是的(表明需要在后台运行)