首先我们在项目中导入这个框架:
<代码>实现“com.mcxiaoke.volley:库:1.0.19”
在AndroidManifest文件当中添加网络权限:
<代码> & lt; uses-permission android: name=" android.permission.INTERNET "/祝辞
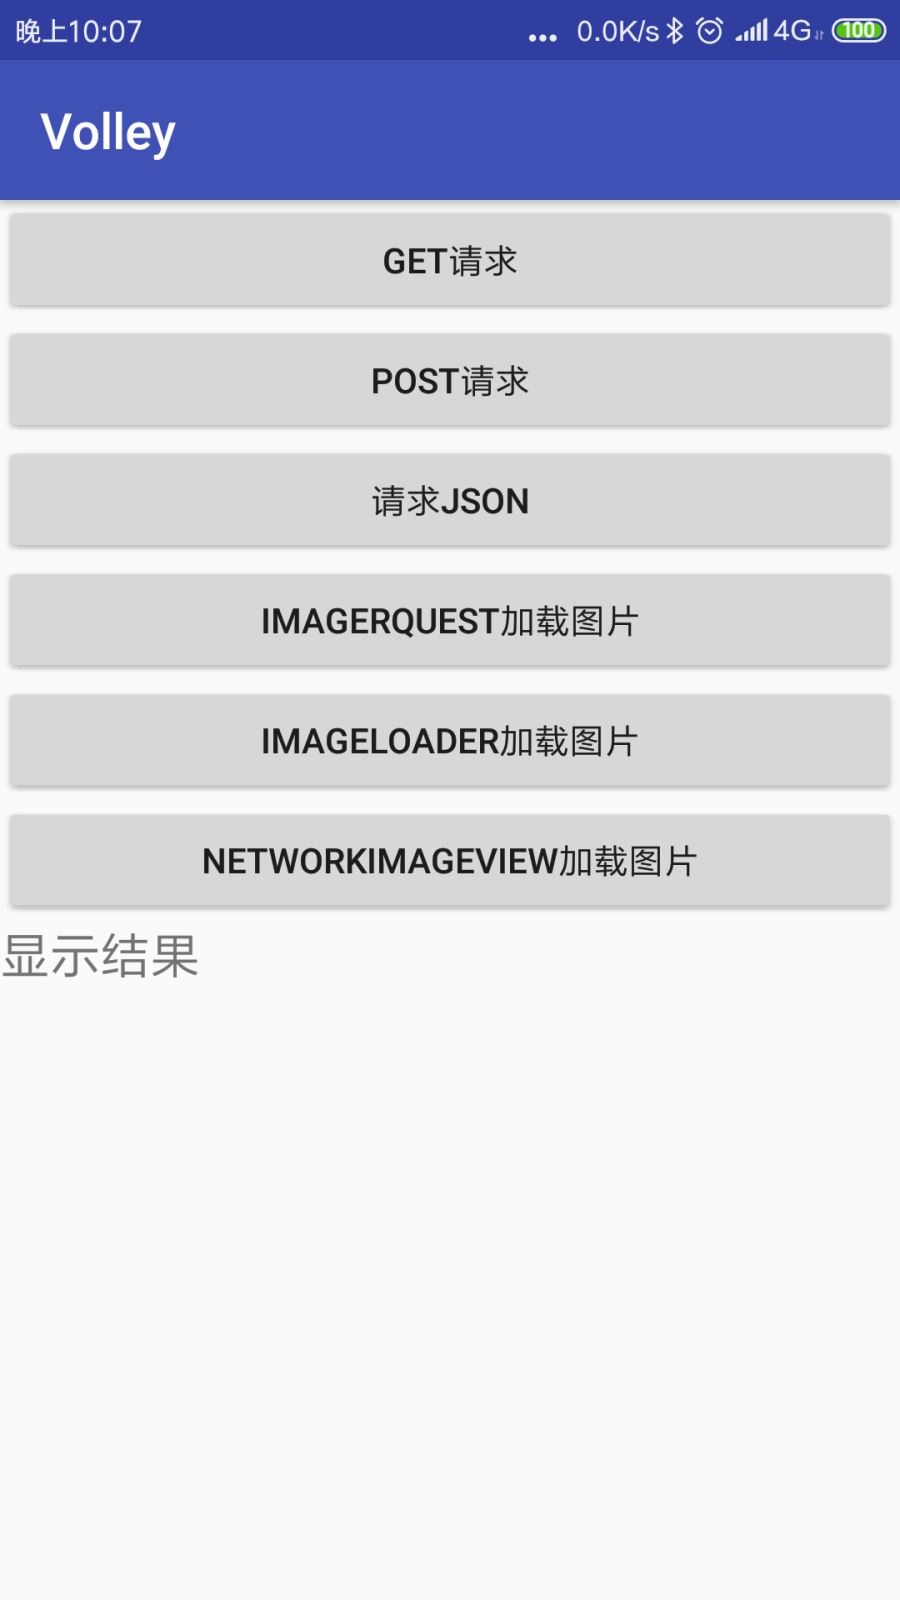
下面是我们的首页布局:
在这个布局当中我们将凌空框架的所有功能都做成了一个按钮,按下按钮之后就会在“显示结果”下面显示结果,显示结果下面使用了一个滚动视图,并在滚动视图下面嵌套了一个Textview和Imageview,用于把我们加载成功之后的图片和文字进行显示。
下面是首页布局的代码:
& lt; & # 63; xml version=" 1.0 " encoding=" utf - 8 " & # 63;比;
& lt; LinearLayout xmlns: android=" http://schemas.android.com/apk/res/android "
xmlns:应用=" http://schemas.android.com/apk/res-auto "
xmlns:工具=" http://schemas.android.com/tools "
android: layout_width=" match_parent "
android: layout_height=" match_parent "
android:取向=按怪薄?
工具:上下文=?MainActivity”比;
& lt;按钮
android: id=癅 + id/得到”
android: layout_width=" match_parent "
android: layout_height=" wrap_content "
android:文本=扒肭蟆?比;
& lt;按钮
android: id=癅 + id/发布”
android: layout_width=" match_parent "
android: layout_height=" wrap_content "
android:文本=昂笄肭蟆?比;
& lt;按钮
android: id=癅 + id/json”
android: layout_width=" match_parent "
android: layout_height=" wrap_content "
android:文本="请求JSON "/比;
& lt;按钮
android: id=癅 + id/ImageRquest”
android: layout_width=" match_parent "
android: layout_height=" wrap_content "
android:文本=" ImageRquest加载图片”/比;
& lt;按钮
android: id=癅 + id/ImageLoader”
android: layout_width=" match_parent "
android: layout_height=" wrap_content "
android:文本=" ImageLoader加载图片”/比;
& lt;按钮
android: id=癅 + id/NetWorkImageView”
android: layout_width=" match_parent "
android: layout_height=" wrap_content "
android:文本=" NetWorkImageView加载图片”/比;
& lt; TextView
android:文本="显示结果”
android: textSize=" 20 sp”
android: layout_width=" wrap_content "
android: layout_height=" wrap_content "/比;
& lt; ImageView
android:可见性="了"
android: id=癅 + id/iv_volley”
android: layout_width=" wrap_content "
android: layout_height=" wrap_content "/比;
& lt; com.android.volley.toolbox.NetworkImageView
android: id=癅 + id/网络”
android:可见性="了"
android: layout_width=" 200 dp”
android: layout_height=" 200 dp/比;
& lt;滚动视图
android: layout_width=" match_parent "
android: layout_height=癿atch_parent”比;
& lt; TextView
android: id=癅 + id/tv_volley_result”
android: layout_width=" match_parent "
android: layout_height=" match_parent "/比;
& lt;/ScrollView>
& lt;/LinearLayout>
为了实现Json请求,进行Json请求一共需要三步,分别是:
1。创建一个请求队列
2。创建一个请求
3。将创建的请求添加到请求队列当中
在创建请求的时候,必须同时写两个监听器,一个是实现请求,正确接受数据的回调,另一个是发生异常之后的回调。这里我们准备了json数据,是在gank.io的官网上找的,大家可以自行百度一下,这里就直接采用了网址:
网址:
http://gank.io/api/xiandu/category/wow
当中的json数据进行json请求了,只要我们在文本显示区返回的数据和这个网站上面的数据显示相同,则请求成功。如果不同也会显示出错误的原因。
在我们进行请求的时候,如果发现我们被请求的json数据是以中括号开头的则使用
JsonArrayRequest
来创建对象,否则则使用下面代码当中的:
JsonObjectRequest
来创建对象
核心代码如下:
json。setOnClickListener(新View.OnClickListener () {
@Override
公共空间>
进口android.support.v7.app.AppCompatActivity;
进口android.os.Bundle;
进口android.view.View;
进口android.widget.Button;
进口android.widget.ImageView;
进口android.widget.TextView;
进口com.android.volley.AuthFailureError;
进口com.android.volley.Request;
进口com.android.volley.RequestQueue;
进口com.android.volley.Response;
进口com.android.volley.VolleyError;
进口com.android.volley.toolbox.JsonArrayRequest;
进口com.android.volley.toolbox.JsonObjectRequest;
进口com.android.volley.toolbox.NetworkImageView;
进口com.android.volley.toolbox.StringRequest;
进口com.android.volley.toolbox.Volley;
进口org.json.JSONObject;
进口java.util.HashMap;
进口java.util.Map;
公开课MainActivity延伸AppCompatActivity {
私人按钮得到;
私人按钮后;
私人json按钮;
私人按钮imagerequest;
私人按钮imageload;
私人按钮netWorkImageView;
私人ImageView第四;
私人NetworkImageView网络;
私人TextView tv_volley_result;
@Override
受保护的空白;
StringRequest StringRequest=new StringRequest (url,新的Response.Listener