官方文档http://react-bootstrap.github.io/getting-started.html
在终端cd到你的项目目录下执行:<代码> npm美元安装react-bootstrap
然后需要我们手动引用css
& lt; !——最新编译和缩小的CSS——比;
& lt;链接rel="样式表" href=" https://maxcdn.bootstrapcdn.com/bootstrap/latest/css/bootstrap.min.css "比;
& lt; !可选的主题——比;
& lt;链接rel="样式表" href=" https://maxcdn.bootstrapcdn.com/bootstrap/latest/css/bootstrap-theme.min.css "在
但是我们在学习的时候使用外部的URL,太慢了。因此我们索引把引导安装到本地。
<代码> npm美元安装引导
然后你会发现在你的node_modules目录下多了引导。
这样页面上就可以引用本地的css了
& lt;链接rel="样式表" type=" text/css " href=" https://www.yisu.com/zixun/node_modules/bootstrap/dist/css/bootstrap.min.css " rel=巴獠縩ofollow”rel=巴獠縩ofollow”在
好,我们动手来使用一下React-BootStrap框架吧
http://react-bootstrap.github.io/components.html
我们这里演示使用它的导航条组件
在index.js里:
const反应=要求(“反应”);
const ReactDOM=要求(“react-dom”);
从“进口{导航}react-bootstrap”;
const navbarInstance=(
& lt; Navbar>
& lt; Navbar.Header>
& lt; Navbar.Brand>
& lt; a href=" https://www.yisu.com/zixun/" rel=巴獠縩ofollow”祝辞react-bootstrap
& lt;/Navbar.Brand>
& lt;/Navbar.Header>
& lt;/Navbar>
);//然后我们渲染到身体里
ReactDOM.render (navbarInstance document.body);
html页面上:
& lt; !DOCTYPE html>
& lt; html>
& lt; head>
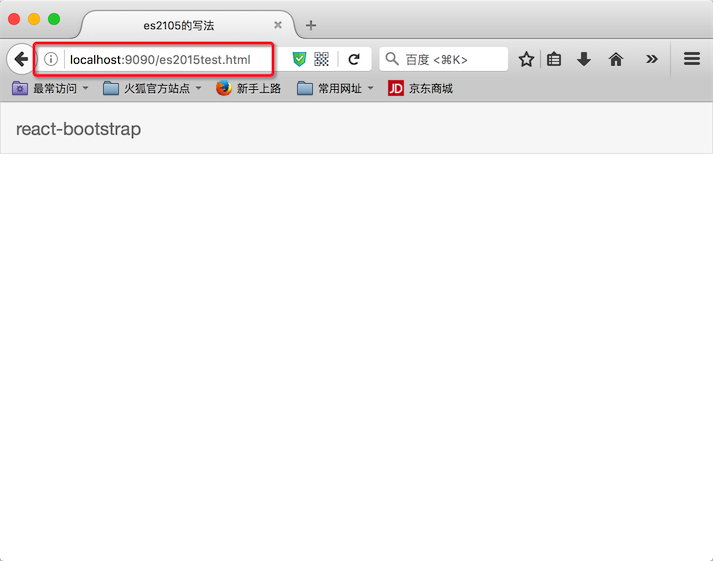
& lt; title> es2105的写法& lt;/title>
& lt;元charset=皍tf - 8”比;
& lt;链接rel="样式表" type=" text/css " href=" https://www.yisu.com/zixun/node_modules/bootstrap/dist/css/bootstrap.min.css " rel=巴獠縩ofollow”rel=巴獠縩ofollow”比;
& lt;/head>
& lt; body>
& lt; div id=癮bc”祝辞& lt;/div>
& lt;/body>
& lt;脚本src=" https://www.yisu.com/zixun/webpack-dev-server.js "祝辞& lt;/script>
& lt;脚本src=" https://www.yisu.com/zixun/index-webpack.js "祝辞& lt;/script>
& lt;/html>
效果如下:
 引导的反应用户体验框架快速上的手