介绍 & lt; ? xml version=?.0“,编码=癠TF-8" ?比;
http://www.springframework.org/schema/beans" & lt; beans xmlns=?;
xmlns: xsi=癶ttp://www.w3.org/2001/XMLSchema-instance",
xmlns: aop=癶ttp://www.springframework.org/schema/aop"
xmlns: p=癶ttp://www.springframework.org/schema/p",,
xmlns: tx=癶ttp://www.springframework.org/schema/tx"
xmlns:上下文=癶ttp://www.springframework.org/schema/context"
xsi: schemaLocation=?
http://www.springframework.org/schema/beans
http://www.springframework.org/schema/beans/spring-beans-2.5.xsd
http://www.springframework.org/schema/aop
http://www.springframework.org/schema/aop/spring-aop-2.5.xsd
http://www.springframework.org/schema/tx
http://www.springframework.org/schema/tx/spring-tx-2.5.xsd
http://www.springframework.org/schema/context
,http://www.springframework.org/schema/context/spring-context.xsd"的在
& lt; bean id=皃ersonDao",类=癱om.mengma.annotation.PersonDaoImpl",/比;
& lt; bean id=皃ersonService",类=癱om.mengma.annotation.PersonServiceImpl"
自动装配=癰yName",/比;
& lt; bean id=皃ersonAction",类=癱om.mengma.annotation.PersonAction"
自动装配=癰yName",/比;
& lt;/beans>
这篇文章将为大家详细讲解有关如何使用弹簧实现自动装配豆,小编觉得挺实用的,因此分享给大家做个参考,希望大家阅读完这篇文章后可以有所收获。
要使用自动装配,就需要配置& lt; bean>元素的自动装配属性.autowire属性有五个值,具体说明如表1所示。
表1自动装配的属性和作用
下面通过案例演示如何实现自动装配。首先将applicationContext。xml配置文件修改成自动装配形式,如下所示。
在上述配置文件中,用于配置personService和personAction的& lt; bean>元素中除了id和类属性以外,还增加了自动装配属性,并将其属性值设置为别名(按属性名称自动装配)。
默认情况下,配置文件中需要通过裁判装配豆,但设置了自动装配=癰yName",春天会在配置文件中自动寻找与属性名字personDao相同的& lt; bean>,找到后,通过调用setPersonDao (personDao personDao)方法将id为personDao的Bean注入id为personService的Bean中,这时就不需要通过裁判装配了。
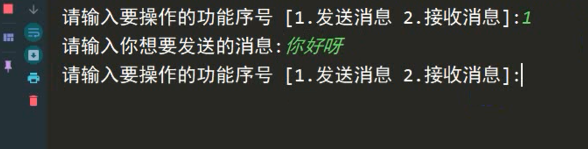
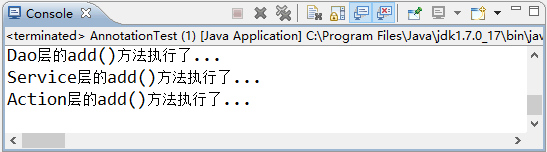
使用JUnit再次运行测试类中()的测试方法,控制台的显示结果如图所示。
关于“如何使用弹簧实现自动装配豆”这篇文章就分享到这里了,希望以上内容可以对大家有一定的帮助,使各位可以学到更多知识,如果觉得文章不错,请把它分享出去让更多的人看的到。